Chapter 13 — Building an Experiment
13.0. Creating experiments
In this chapter we are going to learn how to make a program that runs an experiment and saves the data. We will try to demonstrate both some good experimental design practices, as well as programming practices for making experiments.
How does creating an experiment differ from writing a normal Python program? There are a couple of issues that become very prominent.
Transparency and replicability
In recent years, psychological and social science research has become much more focused on making experiments more transparent and reproducible. This means that, for example, in order to get an experiment published it is very likely that you will be asked to share the code that you used to run the experiment. This means it is more important that the code is clear, well-organized, well-documented.
Modules for creating experiments
We will also note that there are several modules for creating experiments in Python. The most popular of these is called Psychopy (https://psychopy.org). However, we are not going to use any of them in this course, for a couple of reasons. The first is that they each have very specific strengths an weaknesses, particularly with regard to what operating systems they work best on. They can also be very difficult to install on some operating systems.
For these reasons, in this chapter we are going to cover some more basic principles of creating an experiment. Later, if creating experiments becomes important to you, you should be able to quickly learn to use the extra built-in functions that Psychopy or other modules provide.
Sample experiment
Obviously, before writing code for an experiment, you need to know what experiment you want to run.
13.1. Describing a sample experiment
Before we can program an experiment, we need to know what experiment we want to create! This involves specifying in detail what the procedure will be, what the stimuli will be, and what data we want to record. In our example, we are going to create a simple memory experiment.
Experiment purpose
In our memory experiment, participants will go through two “phases”: a “familiarization phase” and a “test phase”. In the familiarization phase they will see a sequence of stimuli (either words or pictures) one at a time. In the test phase they will see a second sequence of stimuli (again one at a time). Some of the stimuli will be ones they saw previously during the familiarization phase (“old” stimuli), and some will be ones they did not see (“new” stimuli).
In our experiment, we will keep track of how many items each participant gets correct, as well as how long it takes them (in milliseconds) to make a decision about each stimulus. In cognitive psychology experiments, reaction time is often recorded because it can give us extra information. For example, maybe certain stimuli are slightly more difficult to remember, but only a little bit. The participant may answer correctly on every trial, but perhaps they will take slightly longer to make a decision about the harder stimuli. We can use differences in reaction times to make inferences about how memory is working, inferences that we sometimes cannot make from accuracy alone.
Our experiment is going to be designed to replicate a well known memory effect called the “list length” effect.
Experiment structure & designing for adaptability and re-use
Beyond the general description above, there are a lot of specific decisions we need to make about how to organize the experiment. For example, how many trials will there be? How will our participants know what to do? Exactly how long will each stimulus be on the screen? Typically, we would base our decisions on these questions based on either theoretical considerations (e.g., we would present stimuli for either a short or a long time because we thought that would effect how well it was remembered), based on what others had done in previous experiments, or a combination of the two.
Independent of what we want to do in our current experiment, it can be good to follow our general programming principle of trying to make sure our code is written in a way to maximize its re-usability and adaptability. That would mean that for example, instead of hard-coding the time a stimulus is on the screen, we would make it a variable that is easily modifiable and can be changed later. Following these ideas, how should we make our experiment?
First, let’s think things through at a general level. What do we need our participants to do?
- Get instructions about the familiarization phase
- Go through the familiarization phase
- Get instructions about the test phase
- Go through the test phase
- Be told the experiment is done
So we can create a program that has those steps as different functions. But notice that steps 1, 3, and 5 are all pretty similar. They are probably just going to involve presenting some text on the screen, and waiting for the participant to press a button to move on. So we can have one function for each of these steps, and just pass that function the text that needs to be presented. Likewise, the familiarization and test phases are quite possibly very similar, perhaps only with different stimuli being presented in each phase. So we can create a single function and pass it the list of stimuli to be presented.
A final issue to bring up about experiment re-use and adaptability is to point out that conceptually our experiment has at least two different functional parts:
- code for moving through each phase of the experiment, choosing the stimuli, and keeping track of the data
- code for presenting stimuli to the screen, and recording responses
These are functionally different in the sense that they will make use of very different python modules. The first one can mostly use all the Python data structures you are already familiar with: loading and writing files, making lists or dictionaries of information, and looping over those data structures. In contrast, to present data to the screen, and to keep track of how participants respond, we need to use some kind of user interface. We could theoretically use the terminal (at least for a text based experiment) but that wouldn’t be very flexible. So we need to use a graphical user interface. For this we will use Tkinter (which we introduced briefly in CH11). But you could use Psychopy or a range of other options. Because you might want to use different graphical user interfaces, or even change what graphical user interface you use, it is good programming practice to keep these two parts of the code independent. We will do that in our example.
13.2. Creating our project structure
In this and the following sections we are going to create the experiment. Follow along with the instructions below, creating the files and code as described. When done, you should have a working experiment!
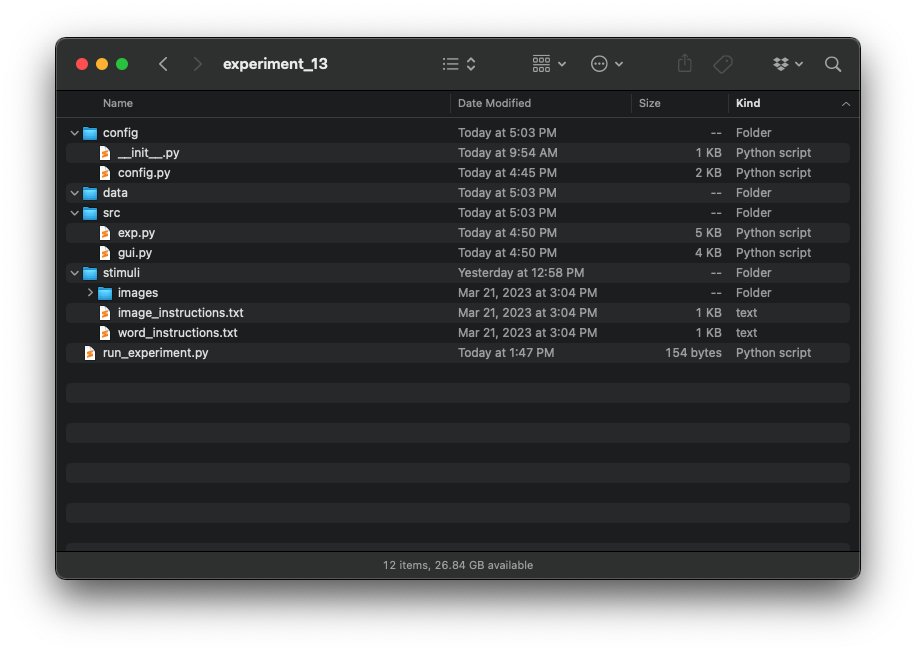
The first thing we need to do when creating an experiment is create a directory structure for all the stuff in our experiment. We are going to have code for running the experiment and for its graphical user interface. We are also going to have stimuli to store (images), and data files to keep track of. Your really need to keep all this organized. So the first thing we are going to do is create a directory structure with some folders and basic files. We want a top level folder called experiment_13. Inside that folder we want to create four sub-folders:
src, where we will put most of our codestimuli, where we will put our imagesdata, where we will put our data filesconfig, where we will put some text files containing variables our program will use
Experiment Stimuli
Our experiment will present participants with a sequence of either pictures or words, and so we will need some pictures. You can get them from our ebook’s data/ directory, in lab13/stimuli.zip. Download that file, and unzip the file into your stimuli folder. You should then end up with an images folder inside your stimuli folder.
Instruction stimuli
Continuing with our theme of making the code as generalizeable and changeable as possible, let’s think about how we want to store the text of the instructions we will give to the participants. We could create a variable in the code that saves the instructions as a string. But that would mean we are really mixing the code of our experiment with the specific details from this experiment. A better approach is to save the instructions in a text file. That way if we later want to change the instructions, or the experiment, the two are independent and we don’t need to worry about changes to one affecting the other. So let’s create two text files our stimuli folder, called word_instructions.txt and image_instructions.txt. These two files will be the instructions we will show to participants depending on whether they are being showed words or images. Inside those files put the following text:
word_instructions.txt
In this experiment you are going to be shown a sequence of words, one at a time. After seeing the entire sequence, there will be a brief delay. Then you will be give a memory test. In the memory test, you will again see a second sequence of words one at a time. For each word, you will decide if it was a word you saw during the first sequence. If you saw the word previously, you will indicate the answer is "yes" by pressing the "j" key. If you did NOT see the word previously, you will indicate the answer is "no" by pressing the "k" key. When you are ready to begin seeing the list of words, press the SPACE BAR.
You have completed the list. Now after a short delay you will have a memory test. You will again see a sequence of words. If you saw the word in the previous list, press the "j" key. If you did NOT see the word in the previous list, press the "k" key. Please rest your right hand on the keyboard on the "j" and "k" keys. Please try to respond as quickly and as accurately as you can.
READY
SET
GO!
You have completed the experiment. Thank you for your participation. Please press the SPACE BAR to quit.
image_instructions.txt
In this experiment you are going to be shown a sequence of pictures, one at a time. After seeing the entire sequence, there will be a brief delay. Then you will be give a memory test. In the memory test, you will again see a second sequence of pictures one at a time. For each picture, you will decide if it was a picture you saw during the first sequence. If you saw the picture previously, you will indicate the answer is "yes" by pressing the "j" key. If you did NOT see the picture previously, you will indicate the answer is "no" by pressing the "k" key. When you are ready to begin seeing the list of pictures, press the SPACE BAR.
You have completed the list. Now after a short delay you will have a memory test. You will again see a sequence of images. If you saw the image in the previous list, press the "j" key. If you did NOT see the word in the previous list, press the "k" key. Please rest your right hand on the keyboard on the "j" and "k" keys. Please try to respond as quickly and as accurately as you can.
READY
SET
GO!
You have completed the experiment. Thank you for your participation. Please press the SPACE BAR to quit.
Note a couple fo things about content of these files. Each file has 6 lines; the lines will correspond to different instructions that will appear on the screen at different times. This way we can store the instructions in a list, and then just reference the position in the list when we want to show that set of instructions. For this reason, it is important that there are no extra line breaks in the file, separating the different sentences that we want to appear on the screen at the same time, even though this makes the lines harder to read because you have to scroll to see them all.
Let’s look more closely at the six lines. The first line gives general instructions that tell someone what will happen during the experiment. This line will display at the very beginning of the experiment. The second line tells them they have finished the first (familiarization) list, and now are going to be tested for their memory of that list. They will say whether they saw the item by pressing the “j” key if they think was in the previous list (an “old” stimulus) or the “k” key if they think it was not in the previous list (a “new” stimulus). The next three lines are the words: ready, set, go, which will appear one at a time to really make sure they are ready to respond as quickly and as accurately as they can. Finally the last line tells them they are done with the experiment.
Program scripts
The final thing we need to do is create the scripts where the actual Python code will live. This program is going to contain five Python script files (though only four will actually have any code in them). The main script will be called run_experiment.py, and will be at the top level of the experiment_13 directory. Inside the src directory, we want to create two additional script files, one called exp.py and one called gui.py. Finally, we want to create two scripts inside the config folder. The first will be called config.py, and the second will be called __init__.py. Note that that is the word “init” with two underscores on each side. Naming it exactly like this is very important, for reasons I will explain in the next section.
For now, just create the five empty files with those names, and we will fill in their content in later sections. When you are done, you should have a directory that looks like this:
13.3. Creating the experiment
In this section we are going to accomplish three things. We will code the main script that we will run from the terminal when we want to run our experiment, called run_experiment.py. As a part of doing this, we will demonstrate how you can import your own Python scripts into another Python script, as we will do here, by importing exp.py and gui.py into run_experiment.py. Finally we will show how we will use a config.py file to set a lot of options in the program.
Coding run_experiment.py
The run_experiment script is going to be very simple. It is really just going to create an instance of a GUI (graphical user interface) class object, and an instance of our Exp class, both of which we will code in later sections. Open run_experiment.py and add the following code:
from src import exp
from src import gui

def main():
    the_gui = gui.Gui()
    the_experiment = exp.Exp(the_gui)
    the_gui.root.mainloop()

if __name__ == '__main__':
    main()
At the bottom we have our typical way of calling a main function. Inside the main function, we create an instance of our GUI class, which we pass to our creation of an Exp class. We then call the .mainloop() method for our GUI instance, which is necessary to keep the experiment window open until we choose to close it. And that’s it!
Importing your own scripts and classes into another script
In earlier chapters you have learned about how to import Python modules like time and sys, which are a part of the Python core made by the same people who made Python. You’ve also probably imported numpy, which is a third-party module, made by someone other than the creators of Python. But it is imported the same way.
But what if you want to import your own code? If the script you want to import is in the same directory as the script you are calling it from, all you need to do is include import filename, at the top of the file, where filename is the name of the script you want to import, without the .py at the end.
In our case, exp.py and gui.py are not in the same directory as run_experiment.py. In this case we need to specify the path to the script using the syntax we did above. By typing from src import exp, we are telling Python there is a directory named src in the same location as the current script (run_experiment.py), and we want to import the script exp.py that is inside that directory.
Config files
The final thing we need to set up before we start coding our two classes is our config file. This is where we will store our experiment’s parameters, like the number of stimuli that will be shown and the amount of time they will be on the screen. As with the instructions, we are storing these in a separate file so they are easy to find and change without needing to look through the main code files.
Our config file is going to be a Python file containing some Python classes. This will make it very easy for our program to access these variables, and we won’t need to manually read in a txt or csv file.
Open config.py and add the following code:
class Config:

    # general window properties
    window_height = 800
    window_width = 1200

    # properties of the instructions
    instructions_bg_color = "white"
    instructions_font_color = "black"
    instructions_font_size = 18
    instructions_font = "helvetica"
    instruction_delay = 1000  # amount of time that timed instructions are on the screen

    # properties of the text and image stimuli
    stimulus_bg_color = "white"
    stimulus_font_color = "black"
    stimulus_font_size = 32
    stimulus_font = "helvetica"
    image_stimulus_height = 400
    image_stimulus_width = 400
    inter_trial_interval = 1000  # amount of time between trials, in ms
    stimulus_presentation_time = 1000  # amount of time each word or image is on the screen

    # properties of the familiarization phase
    num_familiarization_trials = 4
    familiarization_key_list = None  # which keys end trial, if None, will end after stimuluus presentation time

    # properties of the test phase
    num_test_trials = 4
    test_from_fam_proportion = 0.5  # percentage of test trials that were in the familiarization condition
    test_key_list = ["j", "k"]
    test_delay = 1000  # amount of time between familiarization and test phases

    # properties defining differences between text and image conditions
    condition = 1  # sets whether we will use words (0) or pictures (1) in the experiment
    instruction_file_path_list = ["stimuli/word_instructions.txt", "stimuli/image_instructions.txt"]
    stimulus_type_list = ["words", "pictures"]
Note that the code above is a Python class, but it is a little different than the ones we have seen before. There are no methods in this class, including no __init__ method. Instead the attribute variables are defined directly, outside of any method. This means that we can access these class attributes without needing to create an instance of the class, like this:
print(Config.window_height) ## would print 800One last detail to point out is that you might remember we created a file called __init__.py in the config folder. We haven’t added any code to that file, and we don’t need to. Why does the file exist? It is there to tell Python that it should treat this file as a module that can be imported by any other file in the project that is called from our main run_experiment.py file. If we didn’t have this file, you would get a file not found error when you try to access the config.py file from one of the other files.
Currently, the settings specify that images should be used (condition = 1), and that the familiarization and test lists should contain 4 items each. These are good numbers to use while you test the code and make sure everything works. Later, when you are sure it all works and running the experiment for your lab assignment, you will set these numbers to 30.
13.4. Coding the Gui class
First we are going to create our Gui class. This class is going to create the window in which the experiment will be displayed, and have different functions for presenting different kinds of stimuli and recording different kinds of data.
We will implement this window using tkinter, which you probably learned about in CH11. If not, do not worry, you should be able to get by without it here. The only thing you really need to know about tkinter for now is that it is a Python module that allows you to create graphical user interfaces (GUI’s). The main entities in tkinter are windows and “widgets”, which are interactive objects you can put inside windows. In this program, we only need one kind of widget, a “label” widget. A label widget can be placed inside a window, and can be used to display text or images.
The __init__() method
Let’s start with our import statements and our __init__ method. At the top of the file, we import all the libraries we are going to use. This includes our config.py library, which we import using slightly different syntax, telling it where that file of our is located (inside the config.py file, which is inside the config/ folder). One of these modules, the PIL module, is likely new, and you will need to install it using uv add pillow in your terminal.
Next we define our Gui Class. In its __init__ method, we define all the attributes that the class will have. We also define the methods that we want to execute when an instance of the class is created. In this case there will be two methods, one to create the window, and one to create the tk label widgets that we will use to present text or images.
import tkinter as tk
import time
from PIL import Image, ImageTk
from config.config import Config

class Gui:

    def __init__(self):
        pass
        self.root = None  # the variable where we will store the main window
        self.stimulus_label = None  #  a tkinter label widget that we will use to present text or images
        self.instructions_label = None  #  a tkinter label widget that we will use to present instructions
        self.key_pressed = None  # variable we will use to keep track of which key has been pressed
        self.image_dict = None  # a dictionary of image names pointing to tk image objects

        self.create_window()
        self.create_labels()
The create_window() method
Next we will create our method that creates the experiment window. We set a variety of the window’s properties using values stored in the config file.
    def create_window(self):
        self.root = tk.Tk()  # create the tk window object and save it in self.root
        self.root.geometry("{}x{}".format(Config.window_width, Config.window_height))  # set the window size
        self.root.title("Experiment")  # set the window title
        self.root.configure(bg="white")  # set the window background color
        self.root.resizable(False, False)  # set the window so that it is not resizable
The create_labels() method
Next we will create our method that creates the tk label widgets. As with the main window, we set a variety of the properties using values stored in the Config file.
    def create_labels(self):
        self.instructions_text_label = tk.Label(
            self.root, anchor='center',
            height=Config.window_height,
            width=Config.window_width,
            bg=Config.instructions_bg_color,
            fg=Config.instructions_font_color,
            font="{} {}".format(Config.instructions_font, Config.instructions_font_size)
        )

        self.stimulus_label = tk.Label(
            self.root, anchor='center',
            height=Config.window_height,
            width=Config.window_width,
            bg=Config.stimulus_bg_color,
            fg=Config.stimulus_font_color,
            font="{} {}".format(Config.stimulus_font, Config.stimulus_font_size)
        )
The preload_images() method
Next we need a method that loads all the images. It is very important to load them all now, instead of loading them each time we want to present one to the screen. This is because it takes a bit of time to load an image, and we would rather have that time transpire all at once at the beginning. This method will be passed a list of names of images, and we will hardcode the location of the saved images since we plan on them always being in the same place. If you wanted to make this more flexible, you could save the image location in the config file.
    def preload_images(self, image_name_list):
        self.image_dict = {}  # create an empty dictionary to store the images
        for image_name in image_name_list:  # for each image name in the image name list
            image = Image.open("stimuli/images/" + image_name + ".jpg") # create a PIL image object for that image name
            photo_image = ImageTk.PhotoImage(image)  # convert the PIL image object into a TK image object
            self.image_dict[image_name] = photo_image  # save the image in the dictionary with its name as a the key
You may notice that this method did not get called from inside the class’s __init__ method. That is because we don’t want this method to execute immediately when we create an instance of the GUI class. If you remember back to our run_experiment.py script, at the moment we create the GUI class, we haven’t yet created the Exp class. But the Exp is the class that contains the list of image names. So we will create the method here, but then call it from inside the Exp class after we have created our list of image names.
Another detail here is we are using the PIL library. This is because TK is limited in terms of the kinds of image file types it allows. It only allows .gif files. PIL is a python module for using, manipulating, and converting between different file types. We can load an image of many different file types into a PIL object, and tk allows us to convert that into a tk image object.
The show_instructions() method
This method we will call from inside our Exp class anytime we want to show some instructions to the screen. We will make this method have three parameters:
- a string containing the text we want to display
- what key we want to use to end the display of instructions and remove them from the screen
- whether we want to build in an extra pause before the instruction disappear
    def show_instructions(self, instructions, end_on_key_press, extra_delay=None):
        self.instructions_text_label.configure(text=instructions)  # set the text property of the label to the instruction string
        self.instructions_text_label.pack() # make the label appear in the window
        self.instructions_text_label.pack_propagate(False) # prevent the label from changing size to fit the text
        self.root.update()  # force the window to update its graphics and reflect the changes that were made

        if end_on_key_press:  # if we want to end the instructions after a key has been pressed
            self.key_pressed = None  # set our variable reflecting whether a key has been pressed to False

            # create a tkinter event that activates whenever a key has been pressed
            # when a key has been pressed it calls the specified function check_for_valid_key_press()
            # we pass that function a list of key names that we are considering to be "valid" keys to press to end the
            #    instructions. When a valid key is pressed, that function will set self.key pressed to that key
            self.root.bind('<Key>', lambda event: self.check_for_valid_key_press(event, ["space"]))

            # create a loop that runs while self.key_pressed is False
            # since we set key_pressed to None, which evaluates to False, the loop will run until key_pressed is set
            # to something other than "None" by the self.check_for_valid_key_press() method
            while not self.key_pressed:
                self.root.update()

        else: # if we do not want to end on a key press
            self.root.after(Config.instruction_delay) # sit and do nothing for the amount of time specied in the config file

        # sit and do nothing for an additional amount of time, if specified by extra_delay
        if extra_delay is not None:
            self.root.after(extra_delay)

        self.instructions_text_label.pack_forget() # remove the instruction_text_label from the window
        self.root.update()
The check_for_valid_key_press() method
In this function we use the value of the event variable that was created to keep track of key presses. The event variable is a special tkinter object for keeping track of many different variables relating to events. In the case of a key event like we created, one of the things it will tell us is what key was pressed, stored in event.keysym.
    def check_for_valid_key_press(self, event, valid_keys):
        if event.keysym in valid_keys: # check to see if the key that was pressed is one of the valid keys

            # gets rid of the event checking for key presses, meaning we only will get an event after the first key press
            self.root.unbind('<Key>')

            # makes sure the main window is the active window in the program after the key press
            # this is just there as a precaution in case the key press did something unexpected
            self.root.focus_set()

            self.key_pressed = event.keysym  # set our variable keeping track of what key was pressed to the current value
The show_stimulus() method
The final method in our Gui class is the method we will use to show our text or image stimuli to the screen. The method is passed the current stimulus name, and also a key_list telling us the valid keys to trigger the end of the display of the stimulus. If key_list is None, then the stimulus will stay on the screen for a fixed amount of time.
    def show_stimulus(self, stimulus_name, key_list):
        if Config.condition == 0: # if we are in the word condition
            self.stimulus_label.configure(text=stimulus_name)  # change the text to the current stimulus name
        elif Config.condition == 1:  # elif we are in the iamge condition
            stimulus_image = self.image_dict[stimulus_name]  # retrive the image from the image dict
            # set the label to the current image. This requires both lines below.
            self.stimulus_label.configure(image=stimulus_image)
            self.stimulus_label.image = stimulus_image

        self.stimulus_label.pack()  # show the stimulus label in the window
        self.stimulus_label.pack_propagate(False)  # prevent the label from changing size to fit the image or text
        self.root.update()  # force the window to update and show whatever changes we have made
        time1 = time.time()  # get the current system time, reflecting the exact moment the stimulus went on screen

        if key_list is not None:
            self.key_pressed = None  # set key_pressed back to None

            # just like before, create a tkinter event that activates whenever a key has been pressed
            # when a key has been pressed it calls the specified function check_for_valid_key_press()
            # we pass that function a list of key names that we are considering to be "valid" keys to press to end the
            # sitmulus presentation. When a valid key is pressed, that function will set self.key pressed to that key
            self.root.bind('<Key>', lambda event: self.check_for_valid_key_press(event, key_list))

            # create a loop that runs while self.key_pressed is False
            # since we set key_pressed to None, which evaluates to False, the loop will run until key_pressed is set
            # to something other than "None" by the self.check_for_valid_key_press() method
            while not self.key_pressed:  # loop until self.key_pressed is not None
                self.root.update()

        else: # if key_list is set to None, then sit and do nothing for the specified amount of time
            self.root.after(Config.stimulus_presentation_time)

        time2 = time.time() # get the exact system time
        # compute the time different between when the stimulus was presented and the end of the stimulus, which will
        # correspond to how long it took the participant to respond in the trials where a key must be pressed
        took = time2 - time1

        self.stimulus_label.pack_forget()  # remove the stimulus from the screen
        self.root.update()

        # do nothing for the amount of time we want to delay between stimuli, specied in the Config file
        self.root.after(Config.inter_trial_interval)

        return self.key_pressed, took  # return the key that was pressed and how it took
13.5. Coding the Exp class
The Exp class’s __init__ method
Now let’s begin coding our Exp class. We will start with the class’s __init__ method. Open your exp.py file and add the following code:
import csv
import os
import random
import datetime
from config.config import Config

class Exp:
    def __init__(self, the_gui):
        # an instance of the Gui class, which we will use to present info to the screen
        self.the_gui = the_gui

        # save the time when this run of the experiment started
        self.experiment_start_time = datetime.datetime.now()

        # the time-based random seed for this run -- will be set later
        self.random_seed = None
        self.rng = random.Random()  # a dedicated random number generator for this run

        # a unique number for each participant that we will create
        self.participant_id = None

        # a list of strings containing the data in the instruction file
        self.instruction_list = []

        # a list of all the possible words/images for the experiment
        self.full_stimulus_list = []

        # the list of words in this participant's familiarization phase
        self.familiarization_list = []

        # the list of words in this participant's test list
        self.test_list = []

        # a list that will keep track of the data for each trial in the experiment
        self.data_list = []

        self.create_random_seed()  # generate and save a time-based random seed for this run
        self.create_participant_id()  # a method that will generate a id number of the participant
        self.create_instruction_list()  # a method that will load the data from the instructions text file
        self.create_stimuli_lists()  # a method that will create the list of possible stimuli from the image folder
        self.run_experiment()  # a method that will run the actual experiment
At the top of the file, we import all the libraries we are going to use. This includes our config.py library, which we import using slightly different syntax, telling it where that file of our is located (inside the config.py file, which is inside the config folder).
Then we define our Exp class. In its __init__ method, we define all the attributes that the class will have. We also define the methods that we want to execute when an instance of the class is created. In this case there will be the four methods listed above.
The create_random_seed() method
Next, in order to be able to perfectly replicate the experiment for any given participant, we need to use a random seed. A seed is a number used to initialize the random number generator. Using the same seed will always give the same sequence of random numbers, so we can replicate the exact experimental run for any given participant.
    def create_random_seed(self):
        # convert the start time into an integer seed
        # we can't do this with a datetime object directly, so we have to convert it
        # to a string that looks like a number, then convert that to an integer
        self.random_seed = int(self.experiment_start_time.strftime("%Y%m%d%H%M%S%f"))

        # create a random number generator for this run of the experiment
        self.rng = random.Random(self.random_seed)
The create_participant_id() method
Next up, we will need a method that creates an ID number for each participant. We need this so that we can store each participant’s data without getting the data from each participant mixed up. But we also want to do that in an anonymous way. So what we will do is use the datetime module to get the current date and time (down to the microsecond), and use the random module to generate a random number, and put these together. This means that the probability of two different people running this program on different computers generating two identical ID numbers would be very low.
    def create_participant_id(self):
        # convert the saved start time to a string
        formatted_datetime = self.experiment_start_time.strftime("%Y%m%d%H%M%S%f")

        # choose a seeded random 6 digit number
        random_number = self.rng.randint(100000, 999999)

        # save the combination of start time and random number as the participant id
        self.participant_id = f"{formatted_datetime}_{random_number}"
The create_instruction_list() method
Next, we want to implement the method that loads the instructions and saves them in a list, with each line from the file as a separate item in the list.
    def create_instruction_list(self):
        # create the empty list
        self.instruction_list = []

        # get the current condition (word or image) from the config file
        current_condition = Config.condition

        # get file path from config file
        instruction_filename = Config.instruction_file_path_list[current_condition]

        # open the instruction file in read mode
        with open(instruction_filename, "r") as file:
            for line in file:  # for each line in the file...
                # strip off the newlines from each line in the file
                line = line.strip("\n")

                # replace every period in the current line with a period followed by \n
                line = line.replace(".", ".\n")

                # add the string to the instruction list
                self.instruction_list.append(line)
            # you can compress the logic above into a single line using a list comprehension
            # (this is more Pythonic, but can sometimes be harder to understand)
            # self.instruction_list = [line.strip("\n").replace(".", ".\n") for line in file]
You may wonder, why are we removing the newlines after each line in the file, and then adding newlines back after every period? Remember that each line in the file corresponds to instructions that we want to show up at a different time in the experiment, so in the file, newlines convey that information. Those are the newlines we are removing, because we don’t actually want to print those to the screen. But then we do want newlines to separate each sentence on the screen, (which will look nicer), so we are adding newlines in after every period.
The create_stimuli_lists() method and its sub-methods
Next, we want a method that will generate our stimulus lists from the directory of images. For this we want to create three lists:
- a full stimulus list, containing all the possible stimuli for the experiment
- a familiarization list, containing a specified number of randomly selected items from the full stimulus list
- a test list, containing a specified number of items, half of which are random selections from the familiarization list
Below is the create_stimuli_lists() method. As you can see, in this method, we are just going to call three other methods, for the three parts of this mentioned above. We finish by randomizing the order of both lists.
    def create_stimuli_lists(self):
        # call a function to create each of the three lists
        self.create_full_stimulus_list()
        self.create_familiarization_list()
        self.create_test_list()
This may seem like extra work, creating a function that just calls the other functions. Couldn’t we just put the code from those three functions in this function? Although we could, remember that a principle of good programming is to keep your code well organized, easily readable, and modular. By breaking up our list creation into separate functions, it is really clear where to look if we need to fix mistakes or if we want to change the behavior of the code later. Also, keeping code modular means we could call each of these sub-functions from somewhere else in the code if we wanted to, and run them independently. If the code that generated all the lists at once were all bunched up in one function, we wouldn’t be able to do that.
So now we will create those three sub-functions. In the create_full_stimulus_list() method, we want to load the list of images in the images/ directory, and create a list out of the names of the files (after stripping off the file ending and removing hidden files). We’ll also give it a boolean argument shuffle that specifies whether we want to shuffle the list or not (we do by default).
    def create_full_stimulus_list(self, shuffle=True):
        # get a list of all the files in the images directory
        directory_list = os.listdir("stimuli/images/")
        self.full_stimulus_list = []  # create the empy stimulus list

        # loop through the list of files in the images directory
        for thing in directory_list:
            # if the current item is not a hidden file (hidden files start with ".")
            if not thing.startswith("."):
                # append its name to the stimulus list, minus the file ending
                self.full_stimulus_list.append(thing[:-4])

        # same logic as above, but as a list comprehension
        # self.full_stimulus_list = [
        #     thing[:-4] for thing in directory_list if not thing.startswith(".")
        # ]

        # if this experiment uses images, call the Gui's preload images method, passing it the list of stimulus names
        if Config.condition == 1:
            self.the_gui.preload_images(self.full_stimulus_list)

        # And shuffle the list if we want to (which we do by default)
        if shuffle:
            self.rng.shuffle(self.full_stimulus_list)
In the create_familiarization_list() method, we want to select a random number of those stimuli, using the number specified in the Config file. We already randomly shuffled the full stimulus list earlier when we created it, so we can just take the first num_familiarization_trials items from the list.
    def create_familiarization_list(self, shuffle=True):
        # get a random subset of the full stimulus list
        # thankfully, this should already be shuffled for us, so we can
        # select the first num_familiarization_trials items from the randomized list
        self.familiarization_list = self.full_stimulus_list[
            : Config.num_familiarization_trials
        ]

        # And shuffle the list if we want to (which we do by default)
        if shuffle:
            self.rng.shuffle(self.familiarization_list)
In the create_test_list() method, we want to select a specified number of items (specified in the Config file), half of which come from the familiarization list, and half which do not. We achieve this in the following way. Remember that when we chose the items for the familiarization list, we chose the first num_familiarization_trials from our full stimulus list. So we will use half of those. To choose the new items, we can just pick up right where we left off, and continue taking more items from the randomized full stimulus list. We want to get the next num_test_trials/2 items from the list, because we want half of our stimuli to be new items. (But of course, we should respect the Config.test_from_fam_proportion setting; we’ve set it to 0.5 by default, so we will use that.)
    def create_test_list(self, shuffle=True):
        # figure out how many old and new test items we want based on the config proportion
        num_old_test_trials = round(
            Config.num_test_trials * Config.test_from_fam_proportion
        )

        # make sure the number of old trials stays within the number of available familiarized items
        num_old_test_trials = min(num_old_test_trials, len(self.familiarization_list))

        # so the number of new trials should be the total number of test trials minus the number of old trials
        num_new_test_trials = Config.num_test_trials - num_old_test_trials

        # the new items must come from the stimuli that were not used in familiarization
        available_new_items = self.full_stimulus_list[
            Config.num_familiarization_trials :
        ]

        # Check for issues in our setup. If there are not enough items to run the experiment,
        # raise an error
        if num_new_test_trials > len(available_new_items):
            raise ValueError("Not enough new items to create the requested test list.")

        if num_old_test_trials > len(self.familiarization_list):
            raise ValueError(
                "Not enough familiarized items to create the requested test list."
            )

        # get the requested number of old items from the familiarization list
        self.test_list = self.familiarization_list[:num_old_test_trials]

        # add the requested number of new items from the remaining stimulus pool
        self.test_list += available_new_items[:num_new_test_trials]

        # And shuffle the list if we want to (which we do by default)
        if shuffle:
            self.rng.shuffle(self.test_list)
The run_experiment() method
Finally, we are ready for our run_experiment method! This method will just define the structure of our experiment. Recall that our experiment will have the following structure:
- show our beginning instructions
- present the familiarization list
- show the test instructions
- present the test list
- show the final instructions
Every time we want to show some instructions, we can just call the gui.show_instructions() method that already made. We just need to pass it the correct index in the list. So each time we call it, we pass it the instruction list with a different index.
For the presentation of our stimuli, we will create one additional method present_stimulus_list(). We will define this method in just a minute. If done right, we can re-use this method for both our familiarization and test phases. We will pass this method the list of stimuli we want to use, a list of keys that, when pressed, end the current trial and remove that stimulus, and a boolean variable that specifies whether we want to record the data for that trial or not. We will set this to True for the test phase and False for the Familiarization phase (because participants don’t have to press any keys in that phase).
This method will also call a method we will use at the very end of the experiment, to save the data to a file. We will define this method below.
Finally, we conclude run_experiment() by closing the Gui window.
    def run_experiment(self):
        self.the_gui.show_instructions(self.instruction_list[0], True)
        self.present_stimulus_list(self.familiarization_list, Config.familiarization_key_list, False)
        self.the_gui.show_instructions(self.instruction_list[1], False, Config.test_delay)
        self.the_gui.show_instructions(self.instruction_list[2], False)
        self.the_gui.show_instructions(self.instruction_list[3], False)
        self.the_gui.show_instructions(self.instruction_list[4], False)
        self.present_stimulus_list(self.test_list, Config.test_key_list, True)
        self.the_gui.show_instructions(self.instruction_list[5], True)
        self.save_data()
        self.the_gui.root.destroy()
The present_stimulus_list() method
The present_stimulus_list() method is pretty simple. We just loop through our stimulus list, and call the gui.show_stimulus() method that we have already defined. We pass it the name of the current stimulus, and the list of keys that end the trial (or None, in which case the stimulus will be presented for a fixed amount of time). Remember that we got this info from the Config file and put in as the input argument when the method was called.
The gui.show_stimulus() method returns us the key that was pressed, and the amount of time it took for the key to be pressed. If we want to save this data (also a value we passed in, True in the Test phase and False in the Familiarization phase), we will create a list out of the name of the stimulus, the key that was pressed, and the reaction time, and append that list to self.data_list, our variable for storing the data for all trials.
    def present_stimulus_list(self, stimulus_list, key_list, record_data):
        for stimulus_name in stimulus_list:
            key_pressed, rt = self.the_gui.show_stimulus(stimulus_name, key_list)
            if record_data:
                trial_data = [stimulus_name, key_pressed, rt]
                self.data_list.append(trial_data)
The save_data() method
We are almost done. The last thing we need to do is save the data. The save_data() method needs to do a few things. At this point, our self.data_list variable is a list of lists, with each element in the list containing the data for a single trial. It has:
- the trial_number
- the stimulus name
- the key that was pressed
- the reaction time
We want to add a few more pieces of info to each trial:
- the participant id
- the random seed
- the condition (words vs. images)
- whether the key that was pressed was the correct key.
We also want to add a list at the very beginning of the list of lists, with a header specifying what information is in each list element.
    def save_data(self):
        final_data_list = (
            []
        )  # an empty list where we will put the combined data we aleady had plus the new data

        # insert a new list into our data_list, a list of strings specified what data is stored in each list element
        final_data_list.append(
            [
                "participant_id",
                "random_seed",
                "stimulus_type",
                "trial_number",
                "stimulus",
                "old_or_new",
                "response",
                "correct",
                "rt",
            ]
        )

        # now we need to go through each trial, and create a list with those 8 items listed above
        # for each trial in self.data_list
        for i, trial_data in enumerate(self.data_list):
            final_trial_data = []  # create a new empty list for this trial

            # add the participant id to the trial
            final_trial_data.append(self.participant_id)

            # add the time-based random seed used for this run of the experiment
            final_trial_data.append(self.random_seed)

            # add "words" or "images" to this trial, depending on the value in the Config file specifying the condition
            if Config.condition == 0:
                final_trial_data.append("words")
            else:
                final_trial_data.append("images")

            # add the trial number to the trial data, starting count at 1 instead of 0
            final_trial_data.append(i + 1)

            # add the current stimulus name to the trial data
            final_trial_data.append(trial_data[0])

            # add "old" or "new" depending on whether this test item was in the familiarization list
            if trial_data[0] in self.familiarization_list:
                old_or_new = "old"
            else:
                old_or_new = "new"
            final_trial_data.append(old_or_new)

            # add the key that was pressed
            final_trial_data.append(trial_data[1])

            # add whether the key that was pressed was the correct key
            if old_or_new == "old":
                if trial_data[1] == "j":
                    correct = 1
                else:
                    correct = 0
            else:
                if trial_data[1] == "k":
                    correct = 1
                else:
                    correct = 0
            final_trial_data.append(correct)

            # add the reaction time to the trial data
            final_trial_data.append(trial_data[2])

            # add the data for the current trial to the full final data list
            final_data_list.append(final_trial_data)

        # create a file with the participant's id number as the file_name, ending with .csv
        filename = f"data/{self.participant_id}.csv"

        # use the csv module to write the full list of lists to the file
        with open(filename, "w", newline="") as csvfile:
            writer = csv.writer(csvfile)
            writer.writerows(final_data_list)
13.6. Lab 13
Lab 13 should be relatively easy. Follow the instructions in this chapter to create the experiment, and run it. Once you are sure all the code works as intended, then you are going to take the experiment for real, trying as hard as you can. You will turn in your .csv data file as your lab assignment.
While working on getting the code running, we had the number of familiarization and test trials set to 4. But for your actual participation in the experiment, we want there to be 30 familiarization and test trials. So before you take the experiment for real, make sure the following three lines in your config.py file are as follows:
condition = 1
num_familiarization_trials = 30
num_test_trials = 30
Once you have finished, submit your data (the CSV file with your experimental data) as your lab. The file should look like this:
participant_id,random_seed,stimulus_type,trial_number,stimulus,old_or_new,response,correct,rt
20230630135309211149_458316,20230630135309211149,images,1,raspberry,new,new,1,0.6479840278625488
20230630135309211149_458316,20230630135309211149,images,2,wrench,new,new,1,0.8111679553985596
20230630135309211149_458316,20230630135309211149,images,3,swan,old,old,1,0.3151421546936035
20230630135309211149_458316,20230630135309211149,images,4,potato,old,old,1,0.25566625595092773
Except that your file should have 31 rows (1 header and data from 30 test trials).