Chapter 11 — Graphical User Interfaces with Tkinter
11.0. Graphical User Interfaces
There are many ways you can create Python applications that can be used by you and other people. The first way we have learned is scripts that are run in the terminal. There are also web-based applications: using Python as the code that generates web pages and helps process user interactions with websites (though this is more commonly done with the JavaScript language). The final way is the way you were perhaps most familiar with before learning python: creating apps that run in a window on your computer.
The term we use to describe apps that run in a window is a Graphical User Interface, or GUI. GUIs involve something more than just the normal Python programming language, because they need to interface with the computer’s operating system to generate windows, images, and sounds, and to process input from devices like keyboards, mice, trackpads, and touchscreens. In most cases, there is a separate programming language that is used to do all of this, but often the more popular programming languages like Python create a way for you to use that language within the one that you already know.
There are many different GUI languages. Many of them are specific to single operating systems. But there are a few that are “cross-platform” and allow you to create windows and graphics, and process input, across different operating systems. We are going to briefly introduce you to two of them in this course: Tk and PyGame. This week we will focus on Tk, which specializes in easily creating the kinds of user interfaces you see in productivity apps (windows, buttons, drop down list boxes, and all that). In a later week we will teach you a little Pygame, which as you can guess by the name is primarily used to make games, and specializes in generating graphics and other stuff you commonly see in games.
Tk and Tkinter
Tk was developed as a GUI extension for the Tcl scripting language. It was easy to use and became popular in the 1990s, and so many other programming languages created an interface for the Tk language so that it could be used in those languages. In Python, this interface is called Tkinter.
Tkinter has very simple commands for creating a window and changing it’s properties (like it’s size and color and border). It then makes use of objects called “widgets”, which can be inserted and positioned within a window. Tkinter provides many kinds of widgets. Some examples are:
frame: a way to organize a window into different sub-areas, and bundle widgets togethercanvas: a place where graphics can be drawnmenuandmenubuttons: creating a menu and its optionsbutton: a simple clickable button with a label, that can initiate code when pressedentry: a field to enter text
There are many more widgets. We will cover many of them in later sections, and the rest can be read about in the Tkinter documentation.
Theming GUIs
There is a library called ttkbootstrap that makes it easier to create themed GUIs based on Bootstrap (a popular library for theming web pages). This is helpful for two reasons:
- It makes it easier to create GUIs inspired by oft used trends in web design.
- Unlike Windows, Mac OS’s GUI settings do not currently allow you to change the theme of the GUI, so this is a way to customize your application’s appearance.
You can learn more about it at https://ttkbootstrap.readthedocs.io/en/latest/
11.1. Tkinter applications
Creating a window
To start, let’s begin by just creating a basic application window.
To do this, first we need to introduce the idea of a Python module. A module in Python is a set of extra code that is not active and available in Python by default. Importing a module into Python makes all of that code available to your program. To import a module, we just type import and then the name of the module (remember that case sensitivity matters). It is good programming practice to put all of your import statements at the very top of your Python program.
import tkinter
root = tkinter.Tk()
root.mainloop()
The code should create a window that looks like this (although it may be white, depending on your OS settings):
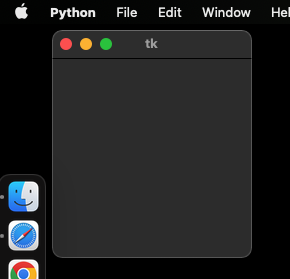
In the second line, tkinter.Tk() creates an instance of a tkinter window object. This needs to be assigned to a variable if we want to do anything with the window, so we assign it to a variable named “root”. This is a common variable name that programmers use to refer to the main window in an application that may end up having many windows. The “root” window is the main window, and then many other windows may “belong” to that window in a hierarchical fashion.
The third line then accesses one of the methods of that window object, the .mainloop() method. This is basically just a command that keeps the window open until some action is taken to close it. If you don’t use this line, you will see the window blink into and out of existence really quickly. The mainloop() method is necessary if you are going to have your application do anything.
Create a Python program called tk_test.py, and try pasting these three lines into it, saving it, and running it. You should have your first window!
When beginners first start working with Python, they may find themselves creating files with names like tkinter.py or math.py. Please avoid doing this at all costs! If you name your files with the same name as another Python module, you will cause what’s called a naming conflict, which causes your local file to shadow the real module. This means that import tkinter as tk will not behave as expected. See Chapter 8’s section on naming conflicts for more details.
Another quick thing to introduce here is the fact that when you import a module, you can rename it within your program so that every time you access code from that module, you won’t have to type it out the long way each time. In the example below, you can see that import tkinter as tk is added to the first line, and that on the second line we then refer to tk instead of tkinter. We may end up calling tkinter many times in a program, and so this can save a lot of time. Most popular modules have standard ways of abbreviating their names in scripts, and the standard way of abbreviating Tkinter is as tk.
import tkinter as tk
root = tk.Tk()
root.mainloop()
Tkinter “Hello World” program
Now let’s make the window a little more interesting, and create a “Hello World” program. The code below as the same three lines as our code above, except we have renamed root to main_window to make it more obvious this is the main window. We also insert three widgets:
- a frame, used to group the other two widgets
- a label, used to insert some text
- a button, used to create a quit button
import tkinter as tk

main_window = tk.Tk()

main_frame = tk.Frame(main_window)
main_frame.grid()

hello_world_label = tk.Label(main_frame, text="Hello World!")
hello_world_label.grid(column=0, row=0)

quit_button = tk.Button(main_frame, text="Quit", command=main_window.destroy)
quit_button.grid(column=1, row=0)

main_window.mainloop()
The code above should create a window that looks like this:

Notice some details about the creation of each widget. Different kinds of widgets have different parameters you can set. The first parameter of each widget is what object that widget “belongs to”, or is considered a part of. The frame widget’s first argument is main_window, so it belongs to the main window and is placed inside of it. The label and button widgets’ first argument is main_frame, so those objects belong to the frame. This demonstrates an important concept of Tkinter, that objects have a hierarchical organization. This can be very useful for organizing applications.
After the first parameter, the other parameters differ for different widgets. Frame widgets don’t need additional arguments (although there are some optional ones we’ll discuss later). Labels have an argument called “text” where you specify what text you want to appear. There are also other optional arguments (like font size and type) that we’ll explore later. The button widget is using two of the optional parameters: text to specify what text appears on the button, and command to specify what function is called when the button is pushed. In this program, we tell Tkinter to execute the .destroy() method of the main window object, which closes the window and exits the application.
Finally, notice that after each widget is created, we call the widget’s .grid() method. The .grid() method is one of three methods we can use to decide where widget’s parent object the widget should occur. The .grid() method arranges widgets using a grid-like row and column format.
When we called the .grid() method on frame, no row and column is specified, and so tkinter assumes the default row and column of 0, meaning the frame is placed in the first row and first column (remember we start counting at 0) of its parent object, which in this case is main_window. Since there are no other objects placed in a grid in the main window, this cell takes up the full window.
When we called the .grid() method on the label and button widgets, both had a row=0, indicating they both go in the first row of their parent (in this case, main_frame). The label widget is placed in the first column, and the button widget is placed in the second column.
Key Tkinter concepts
The example program above illustrates five key concepts of Tkinter (as described in the Tkinter documentation):
Widgets
A Tkinter user interface is made up of individual widgets. Each widget is represented as a Python object, instantiated from classes like tk.Frame, tk.Label, and tk.Button.
Widget hierarchy
Widgets are arranged in a hierarchy. The label and button were contained within a frame, which in turn was contained within the root window. When creating each child widget, its parent widget is passed as the first argument to the widget constructor.
Configuration options
Widgets have configuration options, which modify their appearance and behavior, such as the text to display in a label or button. Different classes of widgets will have different sets of options.
Geometry management
Widgets aren’t automatically added to the user interface when they are created. A geometry manager like .grid() controls where in the user interface they are placed.
Event loop
Tkinter reacts to user input, changes from your program, and even refreshes the display only when actively running an event loop. If your program isn’t running the event loop, your user interface won’t update.
11.2. Tkinter layout management
As we mentioned, there are three ways to arrange widgets in a Tkinter window. We already briefly described .grid(), and there is also .pack() and .place(). We will go over each in a little more detail here.
Grid
Grid is in many ways the easiest layout tool in Tkinter to use. It is easy to conceptualize a window in terms of rows and columns and just put stuff in them. As long as your application’s arrangement can be treated as a two-dimensional table, then grid is probably the best option. It’s only limitation is if you want to more precisely organize things in exact locations. You can do this in grid by embedding frames within frames within frames, but it can get complicated. If you need that level of control then it is best to use place.
import tkinter as tk

main_window = tk.Tk()

color_list = [
    'black',
    'blue',
    'green',
    'cyan',
    'red',
    'magenta',
    'yellow',
    'white'
]

for i, color in enumerate(color_list):
    new_label = tk.Label(main_window, text=color, width=15)
    new_label.grid(row=i, column=0)

    new_entry = tk.Entry(bg=color, width=10)
    new_entry.grid(row=i, column=1)

main_window.mainloop()
The code above creates a window that looks like this (your window background color may be white):
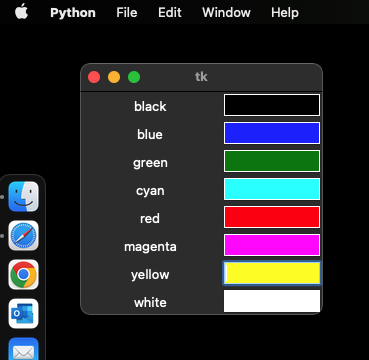
The code above is another example of an important principle: our code can be simpler and better if you can use an algorithm to specify stuff instead of hard-coding it. The code above could have been hard-coded, with eight different creations of label widgets, gridding of those widgets, creation of new entry widgets, and gridding of those widgets. By using a loop we were able to accomplish the same thing much more concisely.
Two other things to note about the above example. First is that if you want to apply colors in Tkinter (to text, graphics, or to the backgrounds of objects), you can do this by specifying color names. If you want to get more specific, you can specify colors using rgb (red-blue-green) color codes specified in hexidecimal codes following a pound sign. For more information about hex-based colors in Tkinter, see here: https://www.tutorialspoint.com/how-to-use-rgb-color-codes-in-tkinter
The second thing is to note that in our loop, we created a new_label object and a new_entry object each time through the loop. Why did this work? It it’s the same variable name, why didn’t each pass through the loop replace the previous one? Here it is important to realize the distinction in Python between the creation of an object and the assignment of that object to a variable. Every time tk.Label() is used, an object is created and placed within it’s parent object. Those widgets exist attached to the window, independently of any variable we happen to assign them to. Assigning them to a variable is only something we need to do if we are going to need to access them again. In this case, we did want to access them again when we used the .grid() method, so we assigned them to a variable. It is the case that each pass through the new label (and new entry field) replaced the old one in the stored variable. At the end of the loop, only the label with the text “white” is stored in new_label, and only the entry widget with the white background is stored in new_entry. If we had wanted to store them all permanently, we could have created a label_list and an entry_list and appended them each time through the loop.
Many more examples and options for the .grid() method can be found here: https://tkdocs.com/tutorial/grid.html
Pack
Pack was the first layout management method created for Tkinter, and so you will still see it in a lot of tutorials. But most people actually recommend against using it except for in very simple applications with only a couple of widgets, because it can be very difficult to use when you have a lot of objects.
Pack just “packs” the object into the parent object after the previous object that was packed. So every object gets put in in the order in which they were packed.
import tkinter as tk

main_window = tk.Tk()
favorite_foods = ["pizza", "ice cream", "strawberries"]

for food in favorite_foods:
    new_label = tk.Label(main_window, text=food)
    new_label.pack()

main_window.mainloop()
This code creates the following window:
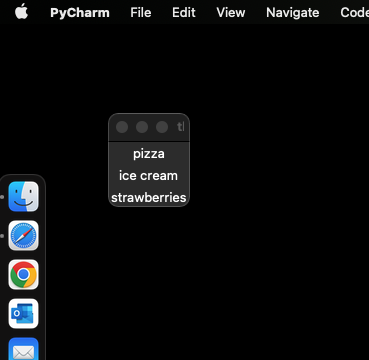
Note here that it packs them from top to bottom. But you can modify the direction from which Tkinter packs the objects:
import tkinter as tk

main_window = tk.Tk()
favorite_foods = ["pizza", "ice cream", "strawberries"]

for food in favorite_foods:
    new_label = tk.Label(main_window, text=food)
    new_label.pack(side=tk.LEFT)

main_window.mainloop()
This code creates the following window:
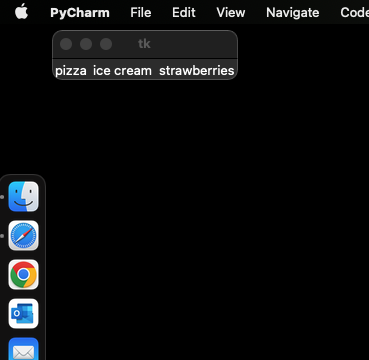
Many more options for the .pack() method can be found here: https://tcl.tk/man/tcl8.6/TkCmd/pack.htm
Place
The last layout management method is conceptually the simplest:.place(). For place, you just specify x,y coordinates within the parent object, in pixels. The only complication is that (0,0) is the top left. So if you have an 800 pixel wide by 600 pixel high window, and you want to place something 10 pixels from the left side, and 50 pixels from the top, you would just do:
import tkinter as tk

main_window = tk.Tk()
main_window.title("Favorite Food")

main_frame = tk.Frame(main_window, height=600, width=800)
main_frame.pack()

new_label = tk.Label(main_frame, text="pizza")
new_label.place(x=10, y=50)

main_window.mainloop()
Which produces:
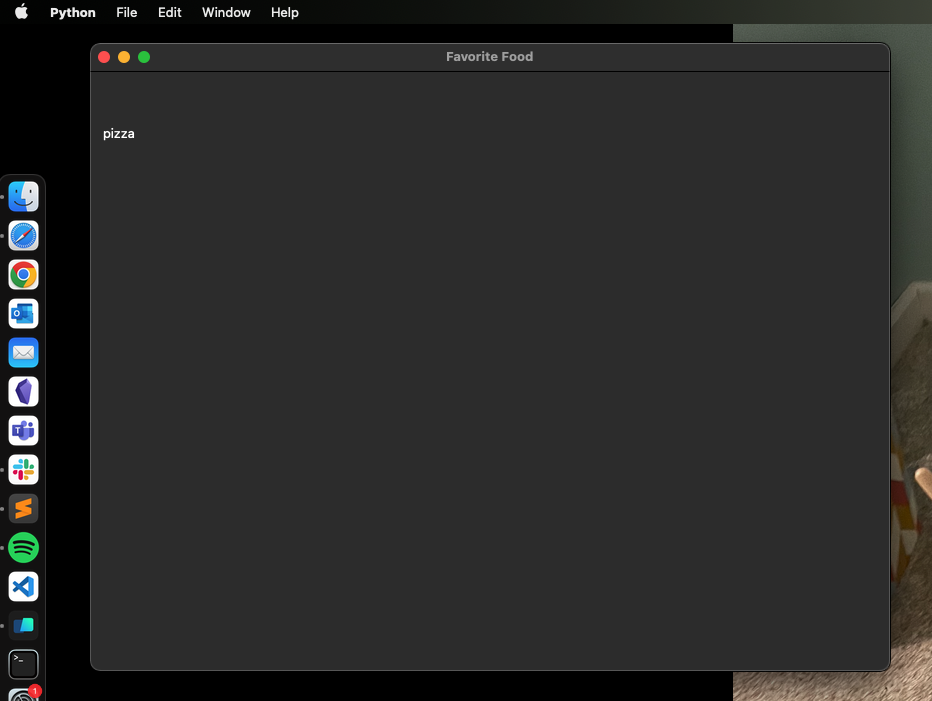
Notice a couple of other things in this example. You can rename the title of the window easily, using the .title() method called on the main window object.
We also resized the main window. You can specify the size of your main window directly using the .geometry(widthXheight) on the main window, or you can leave it unspecified (as we did above) and it will grow to be as big as it needs to be to encompass all of its child objects. In our case, we put an 800x600 frame in the window, so it grew to that size.
A third thing to notice is that we used a mix of .pack() and .place() in this example. But it is important to know, you cannot mix .pack() and .place() within the same parent object, as this will get you an error. But here, we packed main_frame into the main_window, and then we placed new_label in the main_frame, so we are OK. If you have an app with just a couple of main areas (like some content above some buttons) it can make sense to create two frames (a content_frame and a button_frame) and use .pack() to just put them in in order. Then you can use .place() or .grid() within those frames to more carefully organize the widgets in those frames.
There are many more options you can use with the .place() method, which can be found here: https://tcl.tk/man/tcl8.6/TkCmd/place.htm
11.3. Tkinter widgets
Now that we know how to create windows and organize objects, we can run through some of the most commonly-used widgets and some of their options. For a more complete list, see here: https://docs.python.org/3/library/tkinter.html
Label
Changing font size and color
We’ve already introduced the basics of labels, but there are a few more interesting things to cover. Label widgets have many more options:
import tkinter as tk

main_window = tk.Tk()

new_label = tk.Label(
    main_window,
    text="pizza",
    fg="yellow",
    bg="cyan",
    font="Helvetica 16 bold italic"
)
new_label.pack()

main_window.mainloop()
Using images in labels
It is easy to use an image in a tkinter program, you can just attach one to a label widget.
import tkinter as tk

main_window = tk.Tk()

logo = tk.PhotoImage(file="pizza.gif")
image_label = tk.Label(main_window, image=logo)
image_label.pack(side="right")

text_label = tk.Label(
    main_window,
    justify=tk.LEFT,
    padx=10,
    text="my favorite food"
)
text_label.pack(side="left")

main_window.mainloop()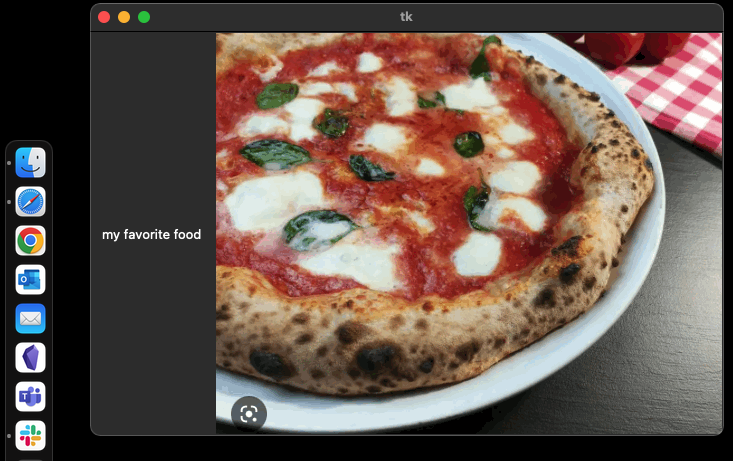
Button Widgets
Many button options can be modified, like the size and shape and properties of the text in the button.
The main use of buttons is to make something in your program happen. Next week we will talk a lot more about creating functions, but here we will quickly show you how you create a function of your own to do something when a button is pressed.
Functions start with the def command, and then the name of the function followed by parentheses and a colon. Then you just put the code for the function inside it, tabbed over.
import tkinter as tk

counter = 0

def change_label():
    global counter
    counter += 1
    label2.config(text=str(counter))

main_window = tk.Tk()
main_frame = tk.Frame(main_window, height=200, width=400)
main_frame.pack()

label1 = tk.Label(main_frame, text="The button has been pressed")
label1.place(x=100, y=100)
label2 = tk.Label(main_frame, text=str(counter))
label2.place(x=300, y=100)
label3 = tk.Label(main_frame, text="times!")
label3.place(x=325, y=100)

new_button = tk.Button(main_window, text="Press Me!", command=change_label)
new_button.pack()

main_window.mainloop()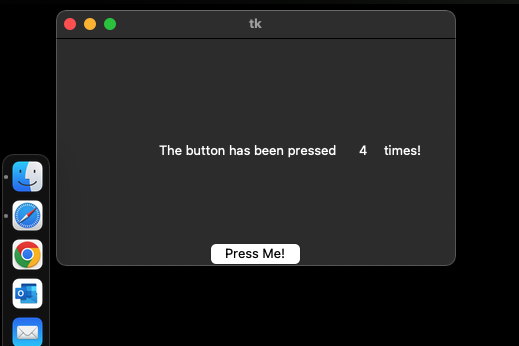
We create the function and put the code we want to run inside it. The first line in the function is telling the function that counter is a global variable. A global variable is any variable defined out in the main level of your Python script, all the way to the left. The second line says that any time the function runs, the counter variable should be incremented by 1. The third line changes the text in label2 to whatever the value of counter is (after converting it to a string, if you try to use an integer as the text for a label, you will get an error).
Entry widgets
An entry widget is a way to get text data from the user.
import tkinter as tk

main_window = tk.Tk()

tk.Label(main_window, text="Name").grid(row=0)
tk.Label(main_window, text="Favorite Food").grid(row=1)

name_entry = tk.Entry(main_window, bg="white")
name_entry.grid(row=0, column=1)

food_entry = tk.Entry(main_window, bg="white")
food_entry.grid(row=1, column=1)

main_window.mainloop()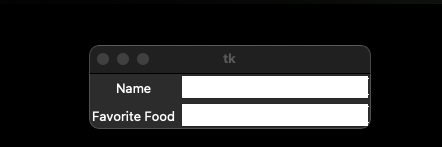
To actually get the data and store it in a variable, you would need to pair it with a “Submit” button. The button could call a function called def get_entry_data() that looks like this:
def get_entry_data():
    name = name_entry.get()
    favorite_food = food_entry.get()
Entry widgets have a .get() method, which you can use to get whatever data is currently typed into them. It will be stored as a string, so if you are getting number input, you will need to convert it.
Tkinter also has Text widgets, which are used for multi-line text input and work similarly to Entry widgets.
In the next section, we’ll learn about canvases, which are a special kind of widget that can be used for graphics.
11.4. Tkinter canvases
The canvas is a special kind of widget is a place for graphics. You can draw lines and shapes, load pictures, and write text. The only thing to remember about canvas widgets is that you can’t put other kinds of widgets inside of them. In other words, you can’t put a button or a label in a canvas. However, you can add text or an image to a canvas, albeit in a different way.
import tkinter as tk

main_window = tk.Tk()

canvas_height = 200
canvas_width = 400

main_canvas = tk.Canvas(
    main_window,
    width=canvas_width,
    height=canvas_height,
    bg="black"
)
main_canvas.pack()

main_canvas.create_rectangle(50, 50, 250, 150, fill="blue")

x = 0
num_lines = 11
x_increment = canvas_width/num_lines

for i in range(num_lines):
    main_canvas.create_line(x, 0, x, 100, fill="green", width=3)
    x += x_increment

main_canvas.create_text(200, 175, text="Hello World!")

main_window.mainloop()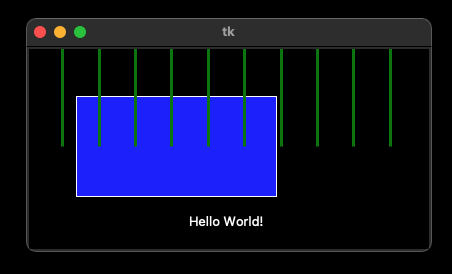
A couple of things to note in this code. When we created the canvas, we can specify its height and width. But notice that we did this in a variable, then assigned the variable. Why do it this way? Now that number is available if we want to use it elsewhere in the application.
When creating rectangles, you have to specify four numbers. These are the top left and bottom right x,y coordinates of the rectangle. We can set the color and border color and all sorts of other properties of shapes like rectangles. There are also many other shapes we can make: ovals, circles, and polygons, where you can just specify a list of coordinates in order and it will connect the points to make a shape.
Drawing lines is very similar: you specify four points, the starting x,y and the ending x,y, as well as the color and width of the line. Note here that we created 11 lines with a loop. Why 11? Well I wanted to divide the canvas into 10 equal parts using the lines, like the marks on a football field. Here is where having the width saved as a variable came in handy. I can figure out how much I need to change the x coordinate of each line by just dividing the width by 11, and then incrementing the value of x each time through the loop. This is nice because if I change the width of the canvas, everything still works exactly as intended.
Animating objects
Of course, if we can draw something once, we can draw the same object many times in order to take advantage of the persistence of vision. In other words, we can create animations! However, we can’t just do this with a for loop, because the loop will run too fast to be visible. Instead, we need to schedule when each frame will occur using the after method. The after method takes two arguments: the first is the amount of time in milliseconds to wait before the function is called, and the second is the function to call. By creating a function that draws the object, and then having it call itself after a certain amount of time, we can create a simple animation.
import tkinter as tk

MOVE_SPEED = 2  # px per frame
TOP_LEFT_X = 20 # we need to specify the top left and bottom right x,y coordinates of the circle
TOP_LEFT_Y = 80
BOTTOM_RIGHT_X = 60
BOTTOM_RIGHT_Y = 120
FRAME_DELAY = 50  # ms


def main():
    # create the window
    window = tk.Tk()
    window.title("Moving Circle")

    # create the canvas
    canvas = tk.Canvas(window, width=400, height=200, bg="white")
    canvas.pack()

    # Draw a circle (there is no circle method, so we will settle for an oval with equal width and height)
    circle = canvas.create_oval(
        TOP_LEFT_X, TOP_LEFT_Y, BOTTOM_RIGHT_X, BOTTOM_RIGHT_Y, fill="blue"
    )

    def move_circle():
        canvas.move(circle, MOVE_SPEED, 0)  # move 2 pixels right, 0 pixels down
        window.after(FRAME_DELAY, move_circle)  # call this function again in 50 ms

    move_circle()
    window.mainloop()


if __name__ == "__main__":
    main()
11.5. An Example GUI
To tie all this together, let’s create a simple application that allows us to upload an image, display it, and then pick a color from a pixel in the image. We’ll also add some sliders to adjust the RGB values of the chosen color. In addition to tkinter, We’ll use the PIL library to handle the image.
import tkinter as tk
from tkinter import filedialog
from PIL import Image, ImageTk # need ImageTk since tkinter can't handle standard PIL images directly

# Constants
CANVAS_WIDTH = 500
CANVAS_HEIGHT = 400
COLOR_DISPLAY_WIDTH = 100
COLOR_DISPLAY_HEIGHT = 50

BLACK = (0, 0, 0)

class ColorPicker:
    def __init__(self, root):
        self.root = root  # tkinter root window
        self.root.title("Color Picker")  # window title

        # Instance variables
        self.image = None  # PIL Image
        self.photo = None  # tkinter PhotoImage
        self.selected_color: tuple[int, int, int] = (
            BLACK  # Initialize to sensible default color
        )

        # Image properties -- we'll change these when the image is loaded
        self.image_x = 0
        self.image_y = 0
        self.image_width = 0
        self.image_height = 0

        # Image boundaries
        self.image_left = 0
        self.image_right = 0
        self.image_top = 0
        self.image_bottom = 0

        # Create GUI elements
        self.setup_gui()

        # Initialize the color display
        self.update_color_display()

    def setup_gui(self):
        # Main frame
        self.main_frame = tk.Frame(self.root)
        self.main_frame.pack(padx=10, pady=10)

        # Image display
        self.canvas = tk.Canvas(
            self.main_frame,
            width=CANVAS_WIDTH,
            height=CANVAS_HEIGHT,
            relief=tk.RAISED,  # raised relief -- gives the impression of depth
            bd=4,  # border width
            cursor="arrow",  # Default cursor
        )
        self.canvas.pack()

        # Add canvas bindings
        self.canvas.bind("<Button-1>", self.pick_color)
        self.canvas.bind("<Motion>", self.update_cursor)  # Add motion binding

        # Buttons frame
        self.button_frame = tk.Frame(self.main_frame)
        self.button_frame.pack(pady=10)

        # Load image button
        self.load_btn = tk.Button(
            self.button_frame, text="Load Image", command=self.load_image
        )
        self.load_btn.pack(padx=5)

        # Color display frame
        self.color_frame = tk.Frame(
            self.main_frame,
            width=COLOR_DISPLAY_WIDTH,
            height=COLOR_DISPLAY_HEIGHT,
            relief=tk.SUNKEN,  # sunken relief -- gives the impression of depth
            bd=2,  # border width
        )
        self.color_frame.pack(pady=10)

        # Color info label
        self.color_info = tk.Label(self.main_frame, text="RGB: --- HEX: ---")
        self.color_info.pack()

        # Add RGB sliders frame
        self.slider_frame = tk.Frame(self.main_frame)
        self.slider_frame.pack(pady=10)

        # Create RGB sliders
        self.sliders = {}

        # We could write these out one at a time, but a for loop saves us some time!
        for color_letter, color_text in [("r", "Red"), ("g", "Green"), ("b", "Blue")]:
            frame = tk.Frame(self.slider_frame)
            frame.pack(fill="x", padx=5, pady=2)

            label = tk.Label(frame, text=color_text, width=6)
            label.pack(side=tk.LEFT)

            # So I learnt that the slider callback (in command) automatically passes the slider's current value
            # We don't need it (we have other ways of getting the value) so we need to deal with that in the callback
            # We have two strategies to deal with that: lambda vs. "eating" the argument
            slider = tk.Scale(
                frame,
                from_=0,
                to=255,
                orient=tk.HORIZONTAL,
                command=self.update_from_sliders,  # Here we're eating the argument -- within update_from_sliders we'll use _=None
                # command=lambda v: self.update_from_sliders(), # if we did it this way, we wouldn't need the _=None in update_from_sliders, but this looks more complicated to my eye
            )

            slider.pack(side=tk.LEFT, fill="x", expand=True)
            self.sliders[color_letter] = slider

    def load_image(self):
        file_path = filedialog.askopenfilename(
            filetypes=[("Image files", "*.png *.jpg *.jpeg *.bmp")]
        )
        if file_path:
            # Load the image
            self.image = Image.open(file_path)

            # Resize the image to fit the canvas while maintaining its aspect ratio
            display_size = (CANVAS_WIDTH, CANVAS_HEIGHT)

            # Make a thumbnail of the image using the display size
            # LANCZOS is one of the resampling methods used to downscale images nicely
            self.image.thumbnail(display_size, Image.Resampling.LANCZOS)

            # Create a tkinter PhotoImage object from the PIL Image
            self.photo = ImageTk.PhotoImage(self.image)

            # Calculate the image's position on the canvas
            self.image_x = CANVAS_WIDTH // 2  # note the use of integer division via two slashes
            self.image_y = CANVAS_HEIGHT // 2
            self.image_width = self.photo.width()
            self.image_height = self.photo.height()

            # Store image boundaries
            self.image_left = self.image_x - self.image_width // 2
            self.image_right = self.image_x + self.image_width // 2
            self.image_top = self.image_y - self.image_height // 2
            self.image_bottom = self.image_y + self.image_height // 2

            # Draw the image on the canvas
            self.canvas.create_image(self.image_x, self.image_y, image=self.photo)

    def update_cursor(self, event):
        if self.image:
            x = self.canvas.canvasx(event.x)
            y = self.canvas.canvasy(event.y)

            # Make the cursor a crosshair if it's within the image's boundaries
            if (
                self.image_left <= x <= self.image_right
                and self.image_top <= y <= self.image_bottom
            ):
                self.canvas.config(cursor="crosshair")
            else:
                self.canvas.config(cursor="arrow")

    def pick_color(self, event=None):
        if self.image and event is not None:
            x = self.canvas.canvasx(event.x)
            y = self.canvas.canvasy(event.y)

            # Check if click is within image bounds
            if (
                self.image_left <= x <= self.image_right
                and self.image_top <= y <= self.image_bottom
            ):
                # Now things get a little hairy because we are deadline with three different coordinate systems!
                # 1. Canvas coordinates (where the user clicked)
                # 2. Image coordinates (where the image is on the canvas)
                # 3. Actual image pixel coordinates (where we need to get the color from)
                # We start with 1 and need to get to 3.

                # Convert canvas coordinates to relative image coordinates
                rel_x = x - self.image_left
                rel_y = y - self.image_top

                # Convert relative image coordinates to actual image pixel coordinates
                img_x = int((rel_x * self.image.width) / self.image_width)
                img_y = int((rel_y * self.image.height) / self.image_height)

                # Get the color of the pixel at the clicked location
                self.selected_color = self.image.getpixel((img_x, img_y))

                self.update_color_display()

    def update_from_sliders(self, _=None):
        # It needs to be _=None because the slider callback automatically passes
        # its current value as an argument.
        # We don't need it, so we set the name to `_` which is the convention
        # for a variable we don't use
        r = self.sliders["r"].get()
        g = self.sliders["g"].get()
        b = self.sliders["b"].get()
        self.selected_color = (r, g, b)
        self.update_color_display()

    def update_color_display(self):
        # We'll unpack the tuple into r, g, b to make my life a little easier
        r, g, b = self.selected_color

        # and use f-strings to format it into hexadecimal format
        # 02x means 2 digits, hex, no padding
        hex_color = f"#{r:02x}{g:02x}{b:02x}"

        self.color_frame.configure(bg=hex_color)

        # Update the color info text
        rgb_text = f"RGB: {self.selected_color}"
        hex_text = f"HEX: {hex_color}"
        self.color_info.configure(text=f"{rgb_text} {hex_text}")

        # Update sliders without triggering their callbacks
        self.sliders["r"].set(r)
        self.sliders["g"].set(g)
        self.sliders["b"].set(b)


def main():
    root = tk.Tk()
    app = ColorPicker(root=root)
    app.root.mainloop()
    # could also just do root.mainloop() here, but since we went
    # to the trouble of creating a class, let's use it!


if __name__ == "__main__":
    main()
If you copy-paste this into a new python file and run it, you’ll see a window with a button to load an image, a canvas to display the image, a square patch to display the color, and three sliders to adjust the color.
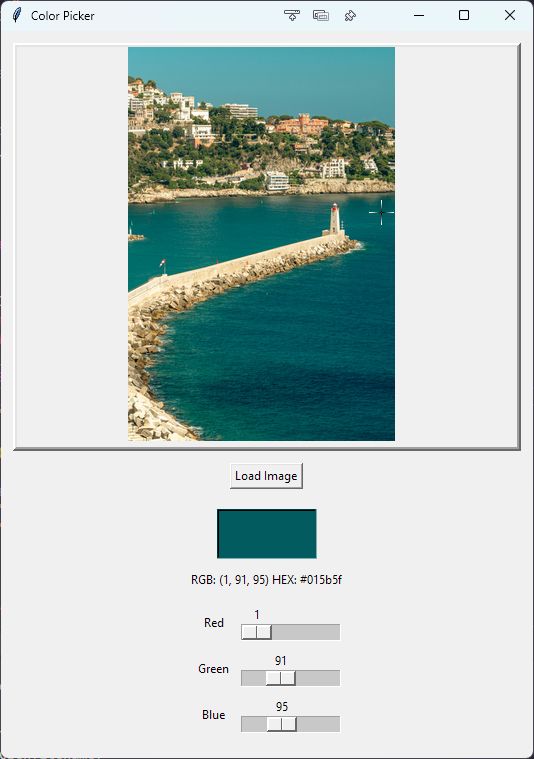
The lab involves doing similar things to the code above, so this should give you an idea of how to make sliders, show images, and place buttons.
11.6. Lab 11
Tip: In addition to Chapter 11, some helpful past sections are 3.4 and 3.5 (for the main function) and 6.0 to 6.4.
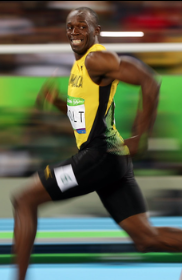
In this lab, we’ll create a simple animation of a runner moving across the screen, whose speed can be adjusted using a slider.
Create a program with a
mainfunction that is called if the script is not imported. This will contain the main logic of the program.Above that main function, at the top level of the scope of the file, create a class called
Display. Within its__init__method, create an attribute calledrootthat creates a tkinter window. This will control the display.Within your
mainfunction, create an instance ofDisplaycalledmy_display, and callmy_display.root.mainloop()so the window doesn’t close. As a result, there should only be 2 lines of code under yourmainfunction.Create another method in your
Displayclass calledinit_window(). This method will be called fromDisplay’s__init__method. Have that method:- rename the window “Runner”
- use a class attribute called
screen_size, set to (800,600), to configure the size of the tkinter window - create two frames in the window, one called
runner_frameand one calledinterface_frame.- Use
.grid()to position theinterface_frameat the bottom. - Make
interface_frame100 pixels tall, and therunner_framethe remainder (i.e. 500). But this should be computed using thescreen_sizevariable — do not hard-code (aka type) the number 500 directly into the program! This way, if the screen size is changed, the frames will stay the correct size.
- Use
Create a method for
Displaycalledcreate_interface_framethat:- creates a “Quit” button. When the button is clicked, the application should terminate.
- creates a “Go!” button. When clicked, it calls another
go()method (we will create that later) - add those buttons to the
interface_frame - Now you get to do some customization: change the appearance of the buttons (size, shape, color, etc.) and arrange these buttons in the
interface_framein a manner of your choosing.
Create a method under
Displaycalledcreate_runner_framethat:- creates a canvas called
action_canvasand adds it to therunner_frame - make sure the
action_canvasoccupies the entirety of the frame! - Add some text that says “Here is a runner. Click the ‘Go!’ button to make them run.” This text should be centered at the top of the canvas.
- Now you get to do some customization: change the font size, type, and color to a choice of your liking.
- save the image shown below, and use tkinter to draw the image to the canvas. The image should be centered and below the text.
- creates a canvas called
- Create a method under
Displaycalledgo()that is activated by pressing the “Go!” button. This method should:- Make the image move horizontally 500 times, each time by 10 pixels.
- But, if the runner gets to either edge of the screen, have the image start moving in the other direction.
- Add a slider widget to the
interface_framethat can be used to change the speed of the runner. (A natural place to do this would be in thecreate_interface_framemethod.)- When the slider is at the far left end, have the runner move 1 pixel every time it moves.
- When the slider is at the far right, have the runner move 10 pixels every time it moves.
- Add a text label widget above the slider that says “Runner Speed”.
- Add the two widgets to the
interface_frame.