Chapter 6 — Classes and Object-Oriented Programming
6.0. Classes and Object-Oriented Programming
We’re ready for our last topic in our Python crash course before we move on to some Brain and Cognitive Science applications. Without further ado, let’s dive into classes.
Object-oriented languages
Python is what is called an object-oriented language. This means that the design of Python is organized around objects. Almost every data structure in Python is an object. Lists, dictionaries, strings, integers, floats, sets - these are all objects. Objects are data structures that allow you to bundle together variables and functions.
Take the humble list, for example: there is the data in the list (e.g., [1, 2, 3]), and then there are the methods you can use on the list (e.g., .append() and .sort()).
Object-oriented languages can be contrasted with functional languages. In a functional language, most of the code exists as functions that take objects as inputs, but are not themselves a part of the objects.
If you reflect on what we’ve been learning, you’ll see that almost everything we’ve learned to do involves objects and their methods, like .append() for lists and .mean() for numpy arrays. We have learned about a few functions that get passed things and don’t belong to a specific object (e.g., print(), sum(), and len()), but these are actually pretty rare in Python.
There are pros and cons to object-oriented languages vs. functional languages. If you’re interested in learning more about this, check out this web page: Functional Programming vs OOP
Creating our own classes
So far we’ve been using Python’s built-in classes, such as lists, dictionaries, strings, and so on. These are powerful, but as programs grow in size and complexity, they aren’t always enough on their own. Imagine writing a program to simulate a neural network. You might need to keep track of each neuron’s activation level, its connections to other neurons, and the weights on those connections. In principle, you could store all of this information in separate lists and dictionaries, but that can get messy quickly. A Neuron class, on the other hand, would allow us to bundle all of the data and behavior for a single neuron into one object.
Custom classes like Neuron help in a few important ways, including organization, reusability, and abstraction. In particular, abstraction allows us to hide complicated details behind a simple interface. For example, other parts of your program don’t need to know how a neuron updates itself — they would just need to call neuron.update(). This makes it much easier to build large programs piece by piece.
You’ll see all of these benefits firsthand later in the book when we build projects like experiments and simulations. For now, let’s start with the basics of how to define a class.
Creating a class in Python is easy.
class Animal:
    def __init__(self, species):  # notice that the first parameter is `self`!
        self.species = species

my_animal = Animal("dog")
print(my_animal)
print(my_animal.species)
Which generates the output:
<__main__.Animal object at 0x101309810>
dog
The first print statement is what happens when we print the class itself. This just gives us some difficult to read information about the name of the class, and some memory information about where it is stored in your RAM (that’s the 0x101309810 hexadecimal number; yours will likely be different).
RAM, or Random Access Memory, is the part of your computer that stores data temporarily while programs are running. When you create a Python object, like the my_animal object in the example above, the object is stored in RAM so that it can be accessed quickly while the program is running.
Every object in Python, whether it’s a number, string, list, or a custom class like Animal, is assigned a unique location in memory. This location is represented by a memory address, and it’s what you see when you print the object without a custom string representation—such as <__main__.Animal object at 0x101309810>. The 0x101309810 is a hexadecimal number that tells you where, in RAM, that object is stored.
This memory address allows Python to quickly reference and manipulate objects without needing to search for them, making programs faster and more efficient. When you’re done with an object and it’s no longer needed, Python’s garbage collector will eventually remove it from memory to free up space.
Below, let’s walk through four other important things about the class definition above.
Class definitions
When we declare a class, we use the class keyword, and then provide the name of our class. Standard Python naming rules apply (don’t start with numbers, no spaces, etc.). When naming a class, a convention is to start it with upper-case, and to use “PascalCase” (i.e., concatenate words without underscores, and capitalize the start of each word).
Instances of a class
In the line:
my_animal = Animal("dog")we create an instance of the class. Notice how this is very similar to the way we create instances of built-in Python data types:
my_float = float(5)
my_set = set('doggy')
my_array = np.array([1, 2, 3, 4, 5])
In each case we create an instance variable that we name whatever we want, and assign to it the name of the class. When we create the instance, we can pass it information that the class will use when the instance is created.
The __init__() function in a class
A class usually has an __init__() function (often pronounced “dunder init”). This is the function that runs when you create an instance of the class, as we do here. When the instance is created, any code in the __init__() function is run. Think of it like the main() function for setting up that object.
The __init__() function is sometimes called the “constructor” of the class, as it’s a method that’s called when an instance of the class is created. Other languages have similar functionality, but the name or syntax is usually different. For example, in JavaScript the equivalent function is constructor(), while in Ruby it’s initialize().
Using “self” in classes
The final thing to notice about class definitions is that they use a special kind of variable to denote attributes and methods that belong to an instance of the class. This is the self parameter, which you put before any variable in the instance. Again, it has to be the first parameter in the method! You can almost think of self as like a dictionary that stores all the data in the class, but instead of accessing the data using self[variable_name], you use self.variable_name. We only use self before a variable name inside of a class. When we are outside a class dealing with one of its instances, we instead use the instance name that we created (in this case, my_animal) and put that before the variable name to access that variable.
The other thing to notice about self is that we must include it as the first parameter in each function (method) inside of a class, as we did in the __init__() function.
Generating class instances from dictionaries
Some classes have a large number of attributes, which makes it tedious to create instances of the class by passing in each argument one by one.
class Person:
    def __init__(self, name: str, age: int, email: str):
        self.name = name
        self.age = age
        self.email = email
        self.address = address

person = Person(name="Alicia", age=30, email="alicia@example.com", address="123 Main St, Springfield, IL, USA")
If we had all that data available in some other format, like JSON, we could read that data into a dictionary and then use the ** operator to easily create the desired instance.
# here I am typing out the dictionary manually, but in practice you would likely load it from a file
person_data = {
    "name": "Alicia",
    "age": 30,
    "email": "alicia@example.com",
    "address": "123 Main St, Springfield, IL, USA"
}

person = Person(**person_data)
6.1. Class attributes
As we have discussed, classes can have both data (which in classes we call “attributes”) and functions (which in classes we call “methods”). Here we’re going to talk about class attributes.
There are two ways you can add attributes to a class: (1) by adding them to the instance or (2) by adding them to the class definition itself. Let’s start by adding attributes to a class instance:
class Human:
    pass

jon = Human()
print(jon)

jon.name = 'Jon'
jon.age = 44

print(jon)
Which generates the output:
<__main__.Human object at 0x101309b10>
<__main__.Human object at 0x101309b10>
As you can see from the two print statements, the object itself doesn’t noticeably change when you add an attribute. That is because the attributes of a class are stored in a dictionary inside the class, which you can access via the __dict__ attribute:
print(jon.__dict__)Which results in:
{'name': 'Jon', 'age': 44}So you could access the specific attributes of a class instance via this dictionary:
print(jon.__dict__['age'])But because the whole point of classes is to make accessing its attributes simple, Python gives us a simpler way: print(jon.age)
The period after the class instance’s name is a way to signify that we are accessing a member attribute of the class. Python creates a shortcut to all the keys in the attribute dictionary, so we can access them more directly.
Like I said, there are two ways to add an attribute to a class, and the way we just did it is the less preferred option. This is because, while it adds the attribute to that instance of a class, it doesn’t add it permanently to the class. Consider the following example:
jon.has_brain = True
print("The 'has_brain' attribute has been added to Jon")
print(jon.__dict__)

andrew = Human()
print(andrew.has_brain) # ERROR
The last line will generate an error. The attribute has_brain was only added to jon, not to Human, and so new attributes created will not have the attribute has_brain.
Declaring attributes in class definition
When we want to define an attribute as a permanent attribute of the class, the easiest way to do it is when we define the class in the first place:
class Human:
    def __init__(self):
        self.has_brain = True
        self.has_heart = True
        self.name = None
        self.age = None
        self.birthplace = None
We can use the __init__() function to define our attributes inside the function. It is commonplace and good practice to define all variables a class will ever have in its initialization function, so that people who look at your code can easily see what attributes a class can have. has_brain is an attribute of all humans, and so is set to True by default. The other attributes (name, age, and birthplace) don’t get set to anything right away. We can just use None as a convenient placeholder.
So now:
jon = Human()

print("Jon has a brain:", jon.has_brain)
print("Jon has a heart:", jon.has_heart)
print("Jon's age:", jon.age)
The first two lines will print True, and the last line will print None, because that is what was assigned to these attributes in the __init__() function, and they haven’t been changed to anything else yet.
As we have already described, you can also pass other variables into a class’s __init__() function, if you want to set variable values immediately when a class member is created. Just like any other function, you have to define them as both an argument (in the function definition), and as a parameter (when you call the function, in this case, when you are creating an instance of the class).
Adding attributes after class definition
We can, of course, add attributes after a class is defined, as we did above:
class Human:
    def __init__(self):
        self.has_brain = True
        self.has_heart = True
        self.name = None
        self.age = None

jon = Human()

jon.num_fingers = 10
Human.num_toes = 10
In the last two lines, we add attributes to a class after it is defined. The first one (num_fingers) only adds the attribute to the instance jon. The second one (num_toes) adds it to the class definition itself. So all existing and future class instances will have that attribute and that value.
We can also initialize the class itself with class attributes:
class Human:
    num_fingers = 10 # class attribute -- this is shared by all instances of the class
    num_toes = 10

    def __init__(self):
        self.name = None
        self.age = None

dan = Human()
print(dan.num_fingers) # 10
6.2. Class methods
In addition to attribute variables, classes can also have functions, which are called methods when they are inside of a class. We have already introduced a kind of class function, __init__(), which is a constructor method called whenever an instance of the class is created.
class Human:
    def __init__(self, name, age):
        self.has_brain = True
        self.has_heart = True
        self.name = name
        self.age = age
We can also create other functions for our class. We could do it in a non-object-oriented way, like so:
def celebrate_birthday(human):
    human.age += 1
    print(f"\nHappy Birthday to {human.name}! {human.name} is now {human.age} years old!")

jon = Human("jon", 44)
celebrate_birthday(jon)
But the object-oriented way is to make that function a member of the class. When we make a function a member of a class, we call it a class “method”. Thus, classes can have two kinds of things: attributes (their stored data) and methods (their functions).
Defining a class method is simple: we just define it inside the class instead of outside of it.
class Human:
    def __init__(self, name, age, sex):
        self.has_brain = True
        self.has_heart = True
        self.name = name
        self.age = age
        self.sex = sex

    def celebrate_birthday(self):
        self.age += 1
        print(f"\nHappy Birthday to {self.name}! {self.name} is now {self.age} years old!")
You will notice a few things above:
- We have to pass
selfinto this function so that it knows that all the attributes and methods of the object are local variables that this function can use. (In general, we need to passselfinto any function defined inside a class.) - When we use the object’s attributes inside the
celebrate_birthday()function, you have to haveselfin front of them there as well. This is how it knows that you are talking about the variable that is an attribute of the class, and not some local variable that you have created inside this method. In fact, if you try to access a variable withoutself, it will generate an error. Likewise, if you create a variable inside a class method without usingself, it will just be a local variable that will disappear when the function has completed.
You access methods of a class the same way you access its attributes, with the class instance’s name, followed by a period, followed by the method name.
jon = Human("jon", 41, "Male")
jon.celebrate_birthday()
6.3. Class inheritance
One final issue with classes we want to deal with is called inheritance. Inheritance is the ability to create a class based on some other class, inheriting all of its properties, and then adding more. This is very useful in programming when we are designing reusable parts. You make simple parts, and then you can make more complex parts out of the simple parts (while still keeping the simple part in case you want to modify it later.)
Here, we define an Animal class that has some basic properties, and one action (method) it can take:
class Animal:
    def __init__(self, name):
        self.name = name
        self.is_alive = True
        self.can_move = True
        self.can_grow = True

    def say_hello(self):
        print(f"\nMy name is {self.name}")
Now we are going to create a new class that inherits the Animal class but adds its own properties:
class Bird(Animal):
    def __init__(self, name):
        super().__init__(name)
        self.has_wings = True
        self.has_feathers = True
        self.can_fly = True

    def say_tweet(self):
        print("Tweet, tweet, tweet!")
You should notice a couple of things. First, we pass the class we are inheriting from as an input argument into the class definition. Look at Animal’s class definition. It doesn’t have an input argument. This is fine. That means it’s a base class. Compare that to Bird, which has Animal as an input argument. This makes Bird a derived class that inherits from Animal.
Next, look inside Bird’s __init__() function. You can see that the first line inside this function is calling Animal’s __init__() function using super(). This is the step that gives all of Animal’s attributes and methods to the new Bird class. super() doesn’t need to know the name of the parent class, as it will find it automatically. It also doesn’t need to pass self as an argument, as it will automatically pass the current object (i.e., self) to the parent class.
(You could substitute super().__init__(name) with Animal.__init__(self, name) in the Bird class’s __init__() function, but super() is the preferred way to do it; super() is more flexible and will not break if the parent class’s name changes in future versions of the code.)
Now let’s look at what happens when we create them:
animal_list = [Animal("Jon"), Bird("Tweety")]

for animal in animal_list:
    animal.say_hello()
    try:
        animal.say_tweet()
    except:
        pass

    for item in animal.__dict__:
        print("\t", item, animal.__dict__[item])
As you can see from this code, Tweety the bird inherits all the attributes and functions of Animal.
6.4. Data Classes
Data classes, introduced in Python 3.7, give you a convenient way to write classes that mostly store data. They can automatically generate common methods like __init__(), __repr__(), and __eq__(), so you get a nice, readable class without writing a bunch of boilerplate.
Before we talk about data classes, we need a quick detour into type hints.
Type hints
Type hints are a way to annotate what type of data you expect a variable to hold. Python usually won’t enforce these types at runtime, but your code editor (and optional tools like type checkers) can use them to point out mistakes early. Here’s a simple example:
name: str = "Alice"
age: int = 30
is_alive: bool = True
In this example, we’re telling our editor that name should be a string, age should be an integer, and so on. If we try to assign a different type of value later, many editors will flag it (for example, with squiggly red underlines).
Type hints are optional when writing data classes, but they’re worth using: they make the class definition self-documenting, and they help your tools help you.
You can also use type hints for more complex data types, like lists and dictionaries, or even custom classes.
name: str = "Alice"
age: int = 30
is_alive: bool = True

favorite_colors: list[str] = ["red", "blue", "green"]
favorite_numbers: dict[str, int] = {"Alice": 1, "Bob": 2, "Charlie": 3}
# assume the existence of an Animal class declared earlier
favorite_animal: Animal = Animal("Dog", True, True, True)
Don’t stress too much over type hints: you can always add them later. We also touch on type hints in Chapter 8.1. Style and Readability, and you can read more about them in the Python documentation.
Basic data class
Here’s a simple example of a data class:
from dataclasses import dataclass

@dataclass
class Animal:
    name: str
    is_alive: bool
    can_move: bool
    can_grow: bool
These few lines of code are equivalent to writing all of this:
class Animal:
    def __init__(self, name: str, is_alive: bool, can_move: bool, can_grow: bool):
        self.name = name
        self.is_alive = is_alive
        self.can_move = can_move
        self.can_grow = can_grow

    def __repr__(self):
        return f"Animal(name={self.name}, is_alive={self.is_alive}, can_move={self.can_move}, can_grow={self.can_grow})"

    def __eq__(self, other):
        if not isinstance(other, Animal):
            return NotImplemented
        return (self.name, self.is_alive, self.can_move, self.can_grow) == (
            other.name,
            other.is_alive,
            other.can_move,
            other.can_grow,
        )
In addition to being more concise, defining Animal as a data class gives us the ability to print out instances in a more readable format, as well as compare two Animal instances with ==.
Features and options
Default values
Data classes can have default values, which can be quite helpful:
from dataclasses import dataclass

@dataclass
class Rectangle:
    width: float
    height: float = 1.0  # default value given if none is provided
    color: str = "white"

my_rectangle = Rectangle(width=10) # width is required, but height and color have defaults
print(my_rectangle) # prints out: Rectangle(width=10, height=1.0, color='white')
Frozen instances
You can keep the data in your data class from changing (i.e. make your class immutable) by using the frozen=True option:
@dataclass(frozen=True)
class Configuration:
    host: str
    port: int = 8080

my_configuration = Configuration(host="localhost")
Attempting to modify a frozen instance will raise FrozenInstanceError.
my_configuration.host = "127.0.0.1" # dataclasses.FrozenInstanceError: cannot assign to field 'host'Post-init processing
Although you won’t generally want to write an __init__ method for every data class, you can use the __post_init__ method to perform additional initialization beyond the default:
@dataclass
class Person:
    first_name: str
    last_name: str
    full_name: str | None = None # `full_name` can be a string or the value `None`

    def __post_init__(self):
        if self.full_name is None:
            self.full_name = f"{self.first_name} {self.last_name}"


person = Person(first_name="John", last_name="Doe")
print(person) # prints out: Person(first_name='John', last_name='Doe', full_name='John Doe')
Field options
The field() function provides additional control over fields, allowing you to specify more complex default values on creation. For example, consider a Student class where we want to automatically assign an id number to each student. We can accomplish this with data classes like this:
from dataclasses import dataclass, field
from typing import ClassVar

@dataclass
class Student:
    name: str
    grades: list[int] = field(
        default_factory=list
    )  # Use default_factory for mutable defaults
    id: int = field(init=False, default=0)  # Field not included in __init__ — don't provide it at creation!
    _id_counter: ClassVar[int] = 0 # class-level counter shared by all students

    def __post_init__(self):
        # Assign an ID, then increment the shared counter
        self.id = Student._id_counter
        Student._id_counter += 1


alex = Student(name="Alex")
print(alex) # prints out: Student(name='Alex', grades=[], id=0)

bill = Student(name="Bill")
print(bill) # prints out: Student(name='Bill', grades=[], id=1) # notice that the id is automatically assigned

charlie = Student(name="Charlie", grades=[95, 87, 92])
print(charlie) # prints out: Student(name='Charlie', grades=[95, 87, 92], id=2)
When should you use a data class?
Data classes work well when you have a class that is mostly about storing a handful of fields — something like a Point, a Configuration, or a Student record. You get __init__(), __repr__(), and __eq__() for free, and you can freeze the object if you don’t want it to change.
On the other hand, if your class does a lot of work (e.g., it has many methods, uses inheritance heavily, or needs unusual control over how instances get created) then a regular class may be easier to reason about. Data classes aren’t wrong in those situations, but they stop saving you much effort once you’re overriding most of the defaults.
Data classes vs. named tuples vs. regular classes
You might wonder how data classes compare to some other related data structures we’ve already encountered.
Named tuples (see Chapter 2.6. Tuples for a review) are lighter weight and always immutable, but they’re also less flexible — you can’t add methods, and you can’t give fields default values as easily.
from collections import namedtuple

Point = namedtuple('Point', ['x', 'y'])
p = Point(x=10, y=20)
print(p) # prints out: Point(x=10, y=20)
Regular classes give you the most control, but at the cost of writing more boilerplate code.
class Person:
    def __init__(self, name: str, age: int):
        self.name = name
        self.age = age

class Student(Person):
    def __init__(self, name: str, age: int, grade: int):
        super().__init__(name, age)
        self.grade = grade
So, data classes sit somewhere in between the two in terms of conciseness and flexibility.
A few tips
- Type hints in data classes follow the pattern
variable_name: type = value(for example,name: str = "Alex"). Try to include them on every field, as they can serve as built-in documentation. - If the data must never change after creation, add
frozen=Trueto the decorator. This is handy for things like configuration objects. - Watch out for mutable defaults! Writing
grades: list[int] = []will share a single list across all instances. Usefield(default_factory=list)instead. See also the section on mutable default arguments in Chapter 8.8. Common Pitfalls for more on this issue. - Finally, remember that
__post_init__()is there when you need to compute or validate something right after the object is created. This can be useful for things like building afull_namefromfirst_nameandlast_name, as we saw earlier.
6.5. Turtle
Lastly, before we get to the lab/homework, we’ll go over the basics of turtle, so that you can use it to create your own simulations.
The Turtle library
Python’s turtle library lets you create pictures and shapes by providing them with a virtual canvas. It is all drawn by creating instances of a Turtle object on a drawing canvas.
import turtle

t = turtle.Turtle() # Create a turtle object
t.forward(100) # Move the turtle forward
t.right(90) # Rotate the turtle right by 90 degrees
t.forward(100) # Move the turtle forward again
t.left(45) # Rotate the turtle left by 45 degrees
t.backward(100) # Move the turtle backward
turtle.mainloop() # keeps the turtle window from closing at the end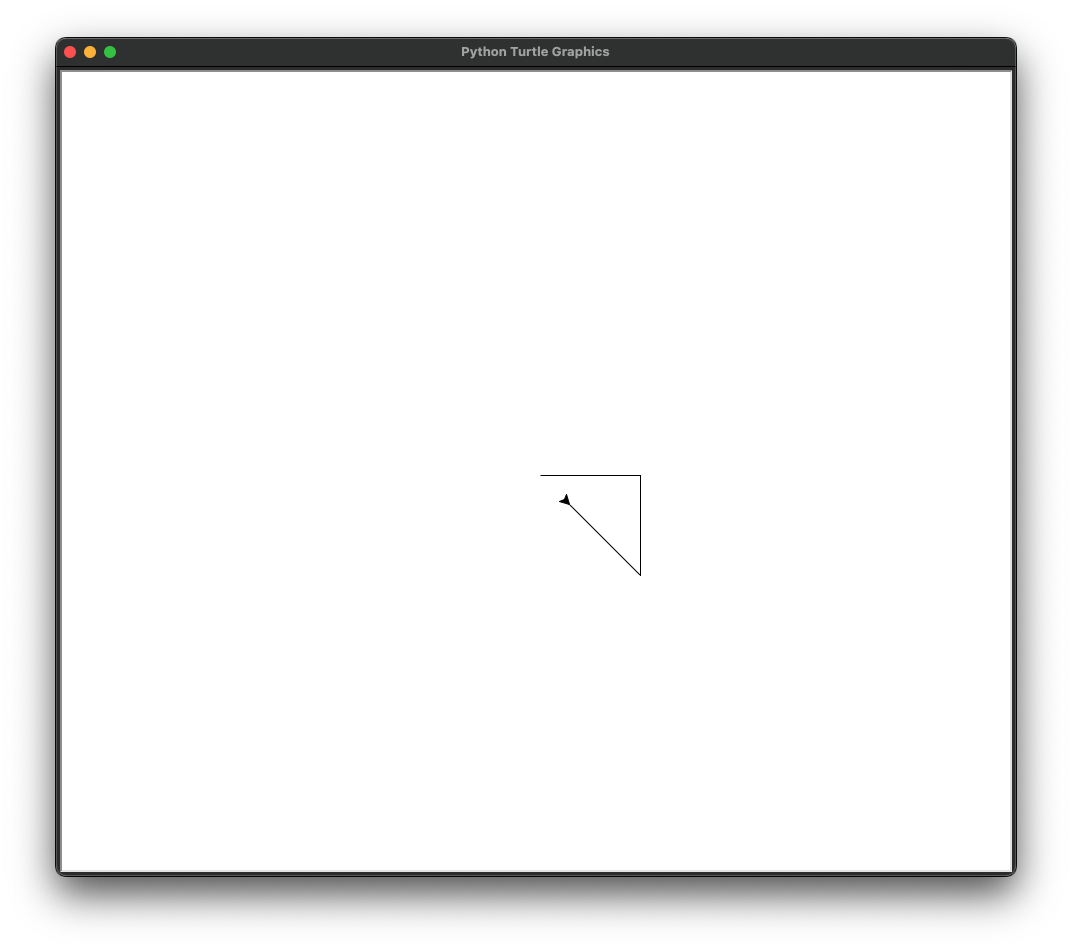
Turtle can be used to draw pictures in all sorts of fun algorithmic ways:
import turtle

# Create a turtle object
t = turtle.Turtle()

# Define the colors for each petal
colors = ["red", "orange", "yellow", "green", "blue", "indigo", "violet", "purple"]

# Loop to draw each petal
for color in colors:
    # Set the pen color for the current petal
    t.pencolor(color)

    # Draw a petal
    t.forward(100)
    t.left(45)
    t.forward(100)
    t.left(135)
    t.forward(100)
    t.left(45)
    t.forward(100)
    t.left(135)

    # Rotate to the next petal position
    t.left(45)

t.hideturtle() # Hide the turtle
turtle.mainloop()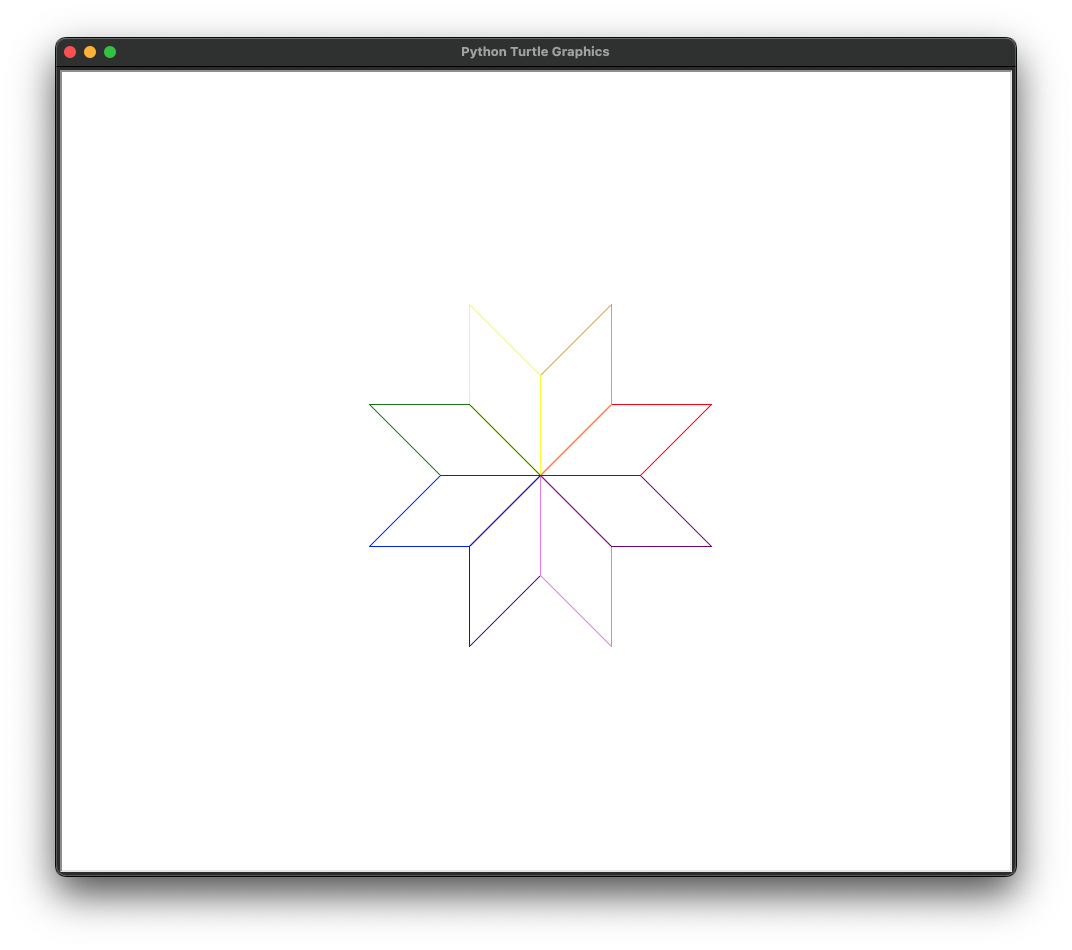
Turtle Attributes and Methods
A turtle is a class, and the line t = turtle.Turtle() creates an instance of that class, which places it at the center of a window. Turtle objects have attributes like their shape, size, and color, and they have methods like forward(), backward(), left(), right(), and many more.
Here are some examples of the attributes and methods for Turtle objects:
import turtle

# Create turtle objects
t1 = turtle.Turtle()
t2 = turtle.Turtle()

t1.speed(3)  # Change the speed attribute
t1.color("blue")  # Change the color attribute
t1.pensize(3)  # Change the pensize attribute
t1.setpos(100, 100)  # Change the position attribute, without drawing if pen is down
t1.goto(100, 200)  # change the position attribute, drawing along the way
t1.setheading(90)  # Change the heading attribute
t1.penup()  # Change the "isdown" attribute to false, which will stop the turtle from drawing if it moves
t1.pendown()  # Change the "isdown" attribute to True, which will make the turtle draw
t1.showturtle()  # make the turtle visible
t1.hideturtle()  # make the turtle invisible

# load a custom graphic into turtle
turtle.register_shape("path/to/your/image.gif") # replace that string with wherever the image is
t1.shape("path/to/your/image.gif")  # set your turtle to the custom graphic located on your computer

# Some turtle methods can take another turtle as an argument
# Calculate the angle from t1 towards t2
angle = t1.towards(t2)
print("Angle from t1 towards t2:", angle)

dist = t1.distance(t2)
print("Distance from t1 to t2:", dist)

t1.setheading(angle) # point t1 in the direction angle, which will point it at t2
t1.forward(dist)  # will move t1 forward the distance between it and t2
Sometimes, with more complex graphics, you may want to create a screen object and then create turtles on that screen, otherwise you may find that the program runs too slowly.
screen = turtle.Screen()
screen.tracer(0) # turn off automatic screen updates -- we'll tell it when to update
t1 = turtle.Turtle()
t2 = turtle.Turtle()

# Assume we have logic to do a bunch of stuff with t1 and t2 here...
...

# Then, when ready, update the screen to make it refresh and show the changes
screen.update()There is a helpful resource for coding Turtle-based graphics in the browser called Trinket. You can find interactive tutorials on Turtle using Trinket here as well as examples of Turtle graphics made by other users here. Alas, Trinket will be shutting down in August 2026, so if you are reading this from the future, you should probably stick to using your own local environment or will need to find another resource for playing with Turtle online.
6.6. Lab 6
def q1():
    print("\n######## Question 1 ########\n")
    """
    In most cases, Python is an object-oriented language. What does this mean? Give an example of a way in which
    Python is object-oriented. Give an example of a situation where Python is not object-oriented, and behaves more
    like a functional programming language.
    """


def q2():
    print("\n######## Question 2 ########\n")
    """
    What is the difference between a class and a class instance in Python? Answer in a print statement in this
    function.
    """


def q3():
    print("\n######## Question 3 ########\n")
    """
    What is the difference between a function and a method in Python? Answer in a print statement in this function.
    """


def q4():
    print("\n######## Question 4 ########\n")
    """
    In the code below, will animal2 be a "cat" or a "dog"? Explain in a print statement.
    """

    class Animal:
        def __init__(self):
            self.species = None

    animal1 = Animal()
    animal1.species = "dog"
    animal2 = Animal()
    animal2.species = "cat"
    Animal.species = "dog"


def q5():
    print("\n######## Question 5 ########\n")
    """
    Create your own class inside this function, with:
        - at least one variable that is passed into the class when an instance is created, and is assigned to an
            attribute in the init function
        - a second method inside the class that changes that attribute after an instance has been created
    Create an instance of your class
    Then call the method you defined and change the value of the attribute
    Print the class, and print the attribute right after creating the instance, and again after you change it
    """


def q6():
    print("\n######## Question 6 ########\n")
    """
    - Hard-code at least five names into the `name_list` below.
    - Then, write a loop that iterates 30 times, each time:
    -   Randomly selects a name from the list
    -   Randomly selects an age between 0 and 110.
    -   Creates an instance of the `Human` class with that name and age
    -   Adds the human to the `human_list`.
    - Then, create a for loop that loops through `human_list` and prints each name and age, like this:
        jon, 13
        mary, 29
    """

    class Human:
        def __init__(self, name, age):
            self.has_brain = True
            self.has_heart = True
            self.name = name
            self.age = age

    name_list = []
    human_list = []


def q7():
    print("\n######## Question 7 ########\n")
    """
    - Create a class outside this function (defined at the global level) called `Song`
    - Define the following attributes in the class's `init` function
        - song_name
        - artist_name
        - lyrics
        - lyric_file_location
        - word_freq_dict
        - total_words
        - unique_words
        - type_token_ratio
    - Make the `lyric_file_location` variable passed into the init function on instance creation
    - Set all other attributes to `None`
    """


def q8():
    print("\n######## Question 8 ########\n")
    """
        - Create a method in the Song class called `load_song`, that
            - opens the file based on the class's `lyric_file_location` attribute
            - saves the lyrics as a string
            - splits the name of the file to get the artist name and song name, and saves them in the appropriate
                attributes of the class as strings. The first word of each artist name, and first word of each song
                title, begins with a capital letter.
        - Call this method inside the Song class's init function
    """


def q9():
    print("\n######## Question 9 ########\n")
    """
    - Create a method in the `Song` class called `analyze_song`, that:
        - lower-cases all words, and removes the punctuation ["'", '"', ',' '.' '(', ')', '!', '?', ';', ':']
            from the lyric string, and then counts the frequencies of the words in the song and stores it in
            the `word_freq_dict` attribute
        - counts the total number of words, and stores in the `total_words` attribute
        - counts the number of unique words, and stores in the `unique_words` attribute
        - computes the type_token_ratio as = total_words / unique_words, and stores it in the `type_token_ratio`
            attribute
    - Call this method inside the `Song` init function
    """


def q10():
    print("\n######## Question 10 ########\n")
    """
        - Download the five lyric files in the ebook's `data/lab6/lyrics/` directory, and save them in a directory
            called `lyrics` located in the same location as this file
        - in this function, use the `os` module to read the list of files in that directory and store them in a list
            called `song_location_list`. If you are using a Mac, make sure you remember to ignore the hidden files!
        - create an empty list called `song_instance_list`
        - loop through each element in `song_location_list`, and for each element create an instance of `Song()`,
            passing it that lyric file, and then add the `Song` instance to the `song_instance_list`.
        - print the name of each artist, song, unique_words, total_words, and type_token_ratio, like this:
            Beyonce_and_jay-z Crazy_in_love 211 747 3.54 (numbers are just an illustration)

    """


def main():
    q1()
    q2()
    q3()
    q4()
    q5()
    q6()
    q7()
    q8()
    q9()
    q10()


if __name__ == "__main__":
    main()
6.7. Homework 6
In your second homework assignment, you are going to make a class-based simulation called “Humans vs. Zombies” using the Turtle module. In this simulation, there will be instances of a Zombie class (zombies) and a Human class (humans). Humans run around the screen (some smartly, some not so much), and zombies try to chase them down and convert them into other zombies.
This simulation is a way to practice object-oriented programming, with particular focus on inheritance and polymorphism (the idea that the same method can have different implementations for different classes).
When complete, you’ll see:
- Smart humans (Lisa) actively fleeing from zombies
- Less smart humans (Homer) moving randomly
- Zombies pursuing the nearest human
- Humans turning into zombies when caught
Setup and requirements
Files
You will need to download the following files from the textbook repository’s images folder:
homer.gif— represents the not-so-smart humanslisa.gif— represents the smart humanszombie.gif— represents the zombies
Imports
You may find yourself using other imports (e.g. os, pathlib, time, and so on), but some of the imports you will definitely need are:
import math
import random
import turtle
Recall that by convention, imports usually go at the top of your file, before any other code you would write.
Setting up the images
First, register the images as shapes in Turtle at the start of your script, below your imports. Depending on where you save the files, you may need to adjust the path to the images! Make sure that your script runs with relative paths and not absolute paths.
turtle.register_shape("homer.gif")
turtle.register_shape("lisa.gif")
turtle.register_shape("zombie.gif")
Classes
The Base Agent Class
Create a parent Agent class that will define the common behavior of all the agents in the simulation (namely, both humans and zombies). They will both inherit from this class. This class will handle basic movement and placement of the agents (i.e. their turtles).
Below I will list the methods that you must implement in the Agent class. You will need to give them the appropriate parameters, implement their logic, ensure that they return the correct values, and that they are used correctly when called.
__init__()
- This method initializes the agent. (Because it is an instance method, it will naturally take
selfas its first argument. This is true of all instance methods.) It should:- take the simulation’s dimensions as an argument, and save them as an attribute.
- take an optional
start_positionargument, which should default toNone. If this argument is provided (i.e., is notNone), the agent should be placed at this position. Otherwise, the agent should be placed at a randomly chosen position within the bounds of the simulation. - set the agent’s
movement_speedto be 1 - create an instance of the
Turtle()class from theturtlemodule and save it as an attribute (you can call itturtleif you like) - hide the agent’s turtle and put its pen up.
- call the
place_agent()method defined below
place_agent()
- This method places the agent at a specific position. It should:
- use the value of the agent’s
start_positionattribute (already defined earlier) to decide where to place the agent- if a
start_positionis supplied, then move the turtle to that location and show the turtle - if a
start_positionis not supplied, then choose a random starting location within the dimensions of the simulation, and move the turtle to that position and show the turtle - Keep in mind that a Turtle screen has coordinates (0, 0) start at the center of the screen. This means that if you have a screen that is, say, 800 pixels wide and 600 pixels tall, the x-coordinates go from -400 to 400 and the y- coordinates go from -300 to 300.
- if a
- use the value of the agent’s
check_if_legal_move()
- This method checks if a move is legal. It should:
- be passed a position as an argument
- return
TrueorFalsebased on whether that location is in the simulation dimensions - Once again, keep in mind that the x-coordinates go from -400 to 400 and the y-coordinates go from -300 to 300 if the screen is set to be 800 pixels wide and 600 pixels tall.
take_turn()
- This method defines the default behavior for all agents on each frame of the simulation. It should:
- call the
find_move()andmove()methods that are defined below
- call the
find_move()
- This method finds a legal move for the agent. It should:
- use a while loop that loops until a legal move is found:
- pick a random potential
new_positionbased on randomly moving the turtle a distance ofmovement_speedin a randomly chosen direction (aka a random angle) - calls the
check_if_legal_move()method (defined above), and passes it thenew_positionas an argument - breaks out of the loop if the move is legal
- You can use boolean sentinels or a
while Trueloop with abreakstatement to accomplish this sort of thing — see Chapter 2.3 Continue and Break for a refresher.
- You can use boolean sentinels or a
- pick a random potential
- returns the (legal)
new_position
- use a while loop that loops until a legal move is found:
move()
- This method moves the turtle to the new position. It should:
- take a
new_positionas an argument - move the turtle to the
new_position
- take a
The Zombie Class
Next, you will create a Zombie class that inherits from the Agent class. Zombies actively pursue the human closest to them.
The Zombie class should have the following methods:
__init__():
- calls its parent’s init function (hint: you can do this by using
super()). This will run all the logic defined in the parent class’s__init__()method. - sets the image of the turtle to the zombie image (which you registered at the top of the file)
- creates the attribute
attack_rangeand sets it to 10
take_turn()
- This is just like the parent’s move function, except that, in addition to doing whatever the parent’s move function does, it also:
- takes a list of humans as an argument
- calls the
find_move()method defined below - also performs an
attack()(more details below — we’ll come back to this) and returns any new zombie created from a successful attack
find_move()
- This is just like the parent’s find_move function, except that its behavior is a little more intelligent: instead of moving
movement_speedunits in a random direction, the zombie moves up tomovement_speedunits in the direction of the closest human. Note: this returns a position, and does not move the turtle itself. That will be handled in themove()method.- take a list of humans as an argument
- Use that list of humans to figure out which human is the closest…
- If the closest human is less than movement_speed units away, then return the closest human’s exact location. Make sure to check that the zombie’s move is legal using the parent’s
check_if_legal_movemethod. - Otherwise, return a position in the direction of the closest human, but only by
movement_speedunits.
attack()
- This method is responsible for converting nearby humans into zombies. It should:
- take a list of humans as an argument (let’s call it
human_list) - check to see if a human from the
human_listis withinattack_rangedistance - if a human is in range, delete that human from the
human_list, and return a new zombie object at the (now deleted) human’s exact location, otherwise returnNone
- take a list of humans as an argument (let’s call it
The Human Class
Create a Human class derived from the Agent class. Humans can either be “smart” (Lisa) or “not smart” (Homer). It should have the following methods:
__init__():- calls its parent’s init function (hint: you can do this by using
super()) - sets the attribute
movement_speedto 2 - randomly sets the attribute
smarttoTrueorFalse - sets the image of the turtle to a picture of Homer Simpson if not
smart, and Lisa Simpson ifsmart
- calls its parent’s init function (hint: you can do this by using
find_move():- takes in a
zombie_listas an argument (which will be used to find the closest zombie further down) - if not
smart, moves the human to a random legal location of distancemovement_speedaway, just like its parent class - otherwise, if it is
smart, it should move a distance ofmovement_speedin the opposite direction of the closest zombie, if that is a legal move, otherwise it should move to a random legal location ofmovement_speeddistance away. (Hint: this will require that you calculate the distance between the human and every other zombie in thezombie_list, then choose the zombie with the smallest distance.)
- takes in a
take_turn():- is like the parent’s, except it also takes in a
zombie_listas an argument, in order for the human to be aware of the zombies around it. This will be passed to the other methods which it calls, and the methods those methods call, and so on. So this take_turn method should callfind_move()with thezombie_listas an argument, then move the human to the new position returned byfind_move().
- is like the parent’s, except it also takes in a
The main program
Now we get to the primary logic of the program. Create and later call a main() function (in the usual way; see Chapter 3.4 if you need a refresher). This main() function should handle the following:
- Screen: Sets the variable
dimensionsto (800,600), and then sets the turtle window to be that size (you can use theturtle.setup()function to do this). If that creates a window too big for your screen, you can make it smaller. - Initial agents:
- Creates the variables
num_humansandnum_zombies. Set them to 1 for now while you get the program working. Later, change them to 20 humans and 1 zombie. - Creates the variables
human_listandzombie_list, which start off empty. Fill each list with the specified number of Humans and Zombies using list comprehensions. When you create each human and zombie, make sure each human spawns in a random location, and the zombie spawns in the middle of simulation.- Recall that the center of the screen is (0, 0) when dealing with the turtle module.
- Creates the variables
- Main loop:
- Creates a while loop that keeps running while there are still humans in the
human_list. Inside that loop it:- Loops through the list of humans and calls their
take_turn()method, passing in the list of zombies as an argument - Loops through the list of zombies and calls their
take_turn()method, passing in the list of humans as an argument- Remember to get the
new_zombiefrom thetake_turnmethod and add it to thezombie_listif it is in fact a zombie and notNone
- Remember to get the
- Loops through the list of humans and calls their
- Creates a while loop that keeps running while there are still humans in the
Performance optimizations
For smooth animation, you can control the frame rate by using the turtle.tracer() function and manually updating the screen.
# Create the screen towards the top of the main function
screen = turtle.Screen()
screen.tracer(0) # disable automatic screen updates

# Do all your logic for drawing elements here
...

# In your main loop, refresh the screen after you've updated all the elements
# Note that this would be called once per frame, so ensure that
# it's at the *bottom* of whatever loop you are using
screen.update()
Helper functions
To calculate the distance between two points, and to update the position of something based on an angle and a speed, you can use basic geometry. Here are some helpful functions that you are welcome to use in your program:
import math


def calculate_distance(point_1, point_2):
    x1, y1 = point_1
    x2, y2 = point_2
    return math.sqrt((x2 - x1) ** 2 + (y2 - y1) ** 2)


def calculate_new_position(current_position, angle_in_degrees, speed):
    """Takes a current position, an angle in degrees,
    and a movement speed, and returns the new position."""
    current_x, current_y = current_position
    angle_in_radians = math.radians(angle_in_degrees)
    new_x = current_x + (speed * math.cos(angle_in_radians))
    new_y = current_y + (speed * math.sin(angle_in_radians))
    return (new_x, new_y)
Turtle itself can also calculate the distance between the current turtle and some coordinate pair:
my_turtle.distance(x_position, y_position)Testing Tips
- Start by testing with a single agent at a time — make sure you can bring up a screen with at least one agent on it. Remember to show the turtle after it has been placed!
- Then have one of each agent type on the screen
- Verify that the agents move correctly
- Make sure that they can’t move outside the screen
- Verify that the zombie behaves as expected (pursuing, attacking, and converting humans)
- Verify that the human behaves as expected (first the not smart ones, then the smart ones)
Again: the coordinate system is centered at (0, 0), so if the screen is 800x600 pixels, then the range of the x-coordinates is -400 to 400 and the range of the y-coordinates is -300 to 300. Do not hard code these values — use the dimensions variable instead.
Good luck!